> ## Documentation Index
> Fetch the complete documentation index at: https://docs.overlap.ai/llms.txt
> Use this file to discover all available pages before exploring further.
> Add an image or video overlay to clips in a workflow.
# Image overlay
> Add a media overlay on top of every video or clip that reaches this node.
The **Image Overlay** page documents the **Media Overlay** node in the workflow builder. Use it when you want to place an uploaded image or video over the source video, such as a full-screen frame, a visual treatment, or another reusable media layer.
### Schema
* **Input**: Video or clips from an upstream trigger or editing node
* **Output**: Video or clips with a media overlay applied
## Add the node
Open **Workflows** from the left sidebar and click **New** to open the workflow builder.
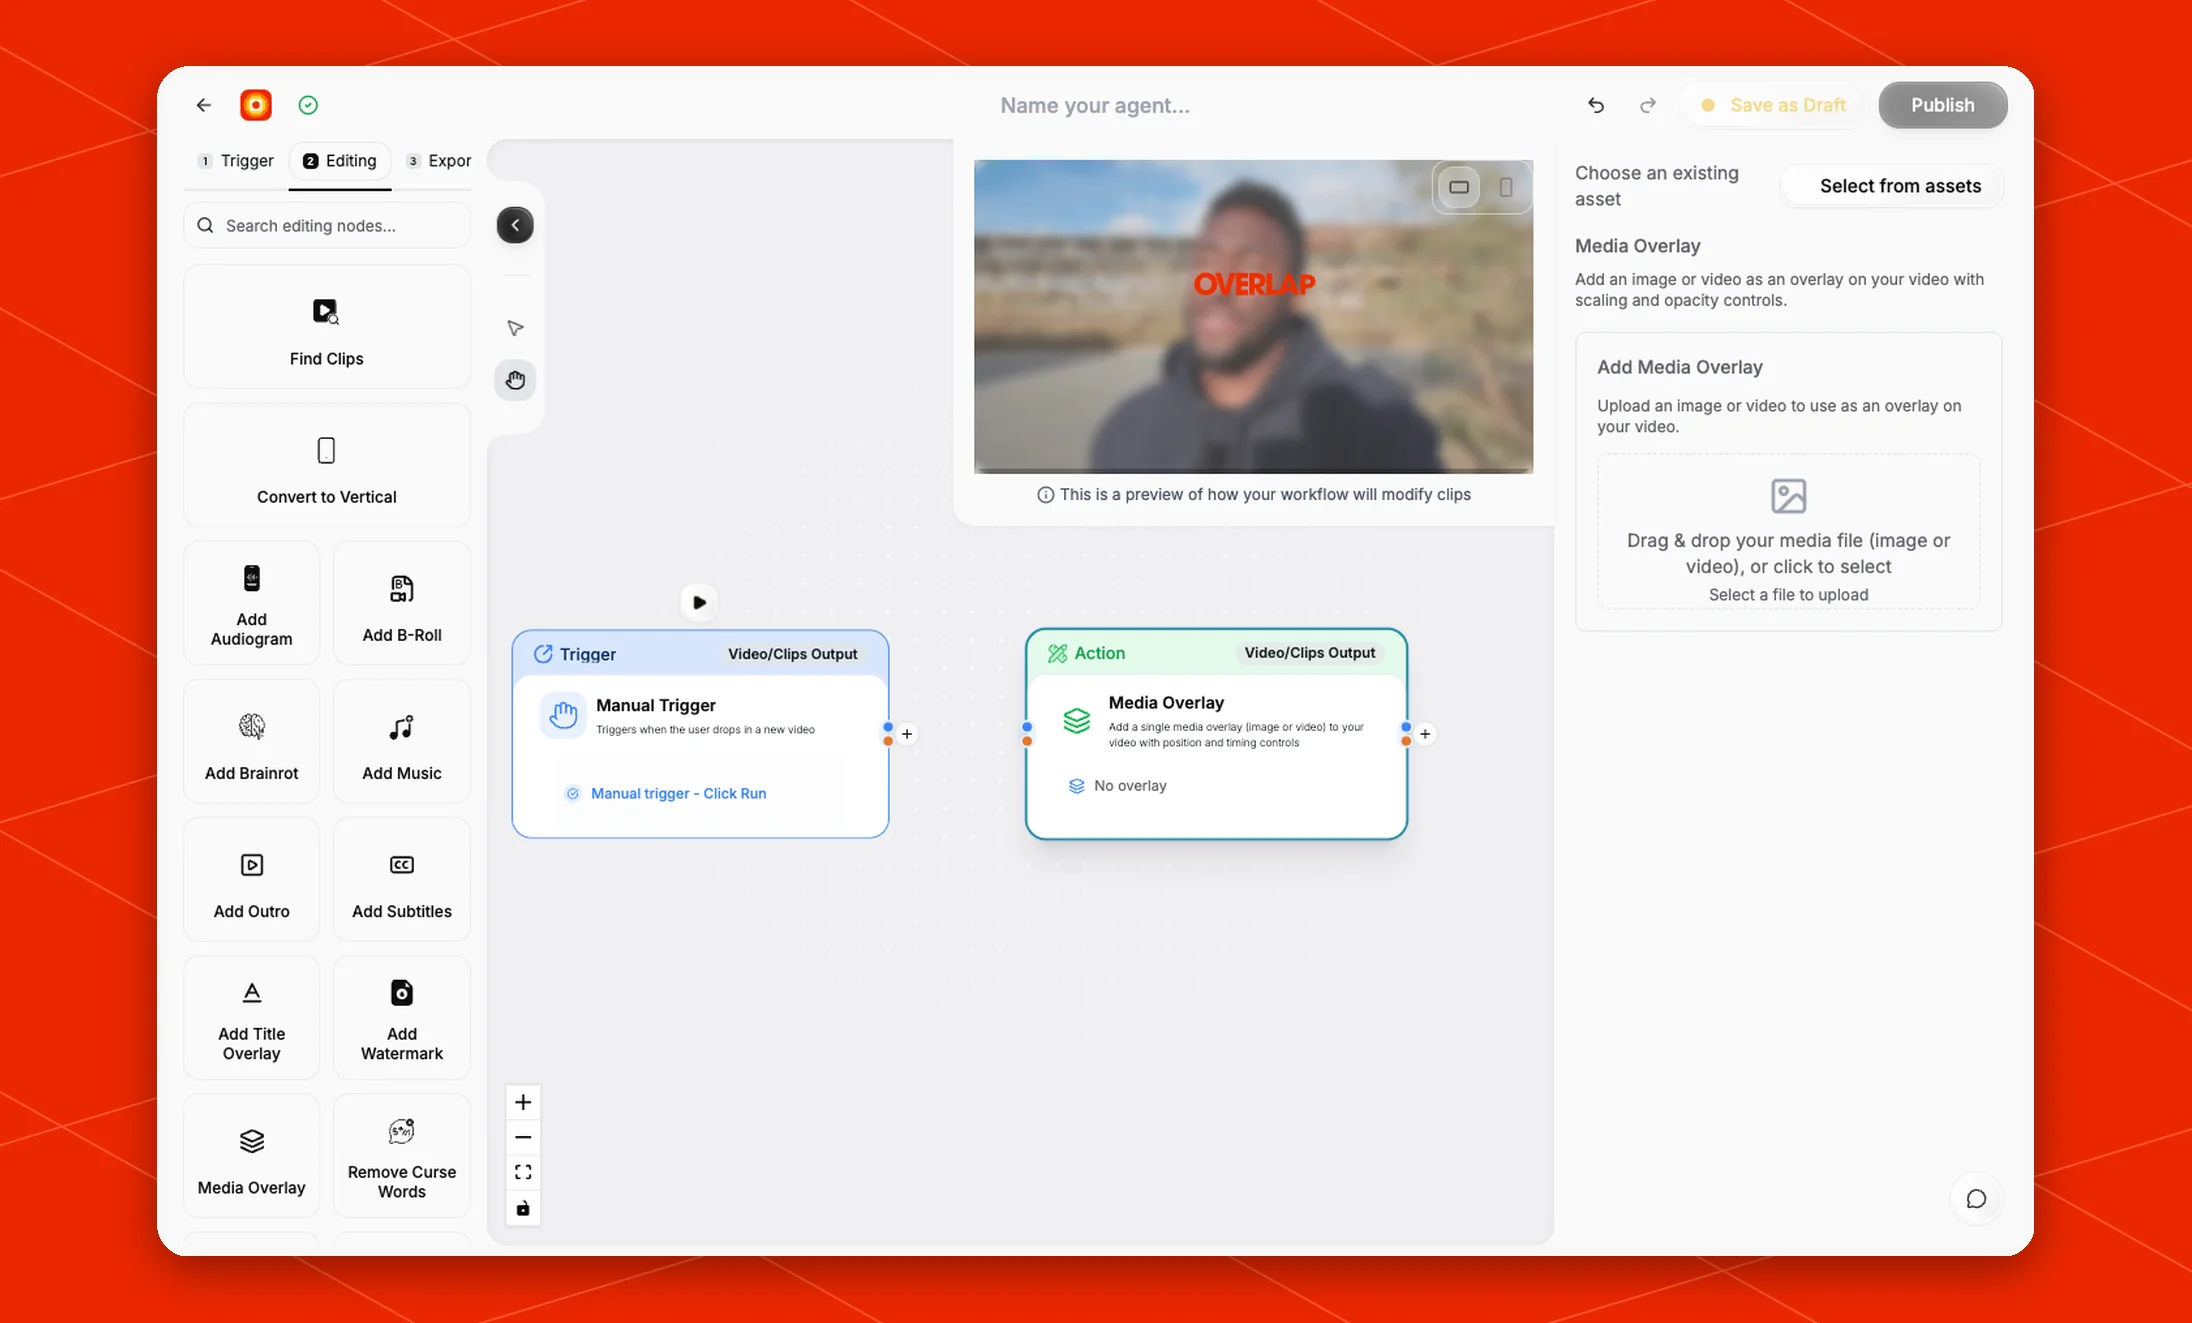
Add a trigger first, such as **Manual Trigger** or **New YouTube Video**. In the **Editing** stage, choose **Media Overlay**. Overlap adds the action node to the canvas and connects it to the workflow path.
Click the **Media Overlay** node on the canvas whenever you need to reopen its settings on the right side.
 ## Choose an overlay asset
Use **Select from assets** when the overlay file already exists in your workspace.
To upload a new file, use **Add Media Overlay** in the settings panel. The upload area accepts an image or video file by drag and drop, or you can click the upload area to select a file from your computer.
Until a file is selected, the node shows **No overlay** on the canvas.
## Configure the overlay
The current settings panel describes Media Overlay as a way to add an image or video overlay with scaling and opacity controls. The node card also describes position and timing controls for the selected overlay.
Use these controls to place the overlay where it should appear in the clip, size it for the video format, and tune how strongly it appears over the source footage.
## Build the rest of the workflow
Place **Media Overlay** after the node that provides the video or clips you want to modify. A common flow is [Manual Trigger](/nodes/manual-trigger) -> [Find Clips](/nodes/findclips) -> **Media Overlay** -> [Add Subtitles](/nodes/subtitles) -> **Post to Social**.
Use [Add Watermark](/nodes/add-watermark) when you only need a watermark-style brand mark. Use [Add Title Overlay](/nodes/branding) when you want generated text instead of an uploaded media file.
## Choose an overlay asset
Use **Select from assets** when the overlay file already exists in your workspace.
To upload a new file, use **Add Media Overlay** in the settings panel. The upload area accepts an image or video file by drag and drop, or you can click the upload area to select a file from your computer.
Until a file is selected, the node shows **No overlay** on the canvas.
## Configure the overlay
The current settings panel describes Media Overlay as a way to add an image or video overlay with scaling and opacity controls. The node card also describes position and timing controls for the selected overlay.
Use these controls to place the overlay where it should appear in the clip, size it for the video format, and tune how strongly it appears over the source footage.
## Build the rest of the workflow
Place **Media Overlay** after the node that provides the video or clips you want to modify. A common flow is [Manual Trigger](/nodes/manual-trigger) -> [Find Clips](/nodes/findclips) -> **Media Overlay** -> [Add Subtitles](/nodes/subtitles) -> **Post to Social**.
Use [Add Watermark](/nodes/add-watermark) when you only need a watermark-style brand mark. Use [Add Title Overlay](/nodes/branding) when you want generated text instead of an uploaded media file.