> ## Documentation Index
> Fetch the complete documentation index at: https://docs.overlap.ai/llms.txt
> Use this file to discover all available pages before exploring further.
> Tighten clip pacing with editorial cuts in a workflow.
# Remove fluff
> Use the General Editor to tighten clip pacing with editorial cuts.
The **Remove Fluff** node is an **Editing** action node for making clips feel tighter before export. Use it after the workflow has a video or clips to process, and before downstream finishing nodes that should receive the tightened result.
### Schema
* **Input**: Video or clips from an earlier workflow node
* **Output**: Clips output with Remove Fluff editorial cuts applied
## Add the node
Open **Workflows** from the left sidebar and click **New** to open the workflow builder.
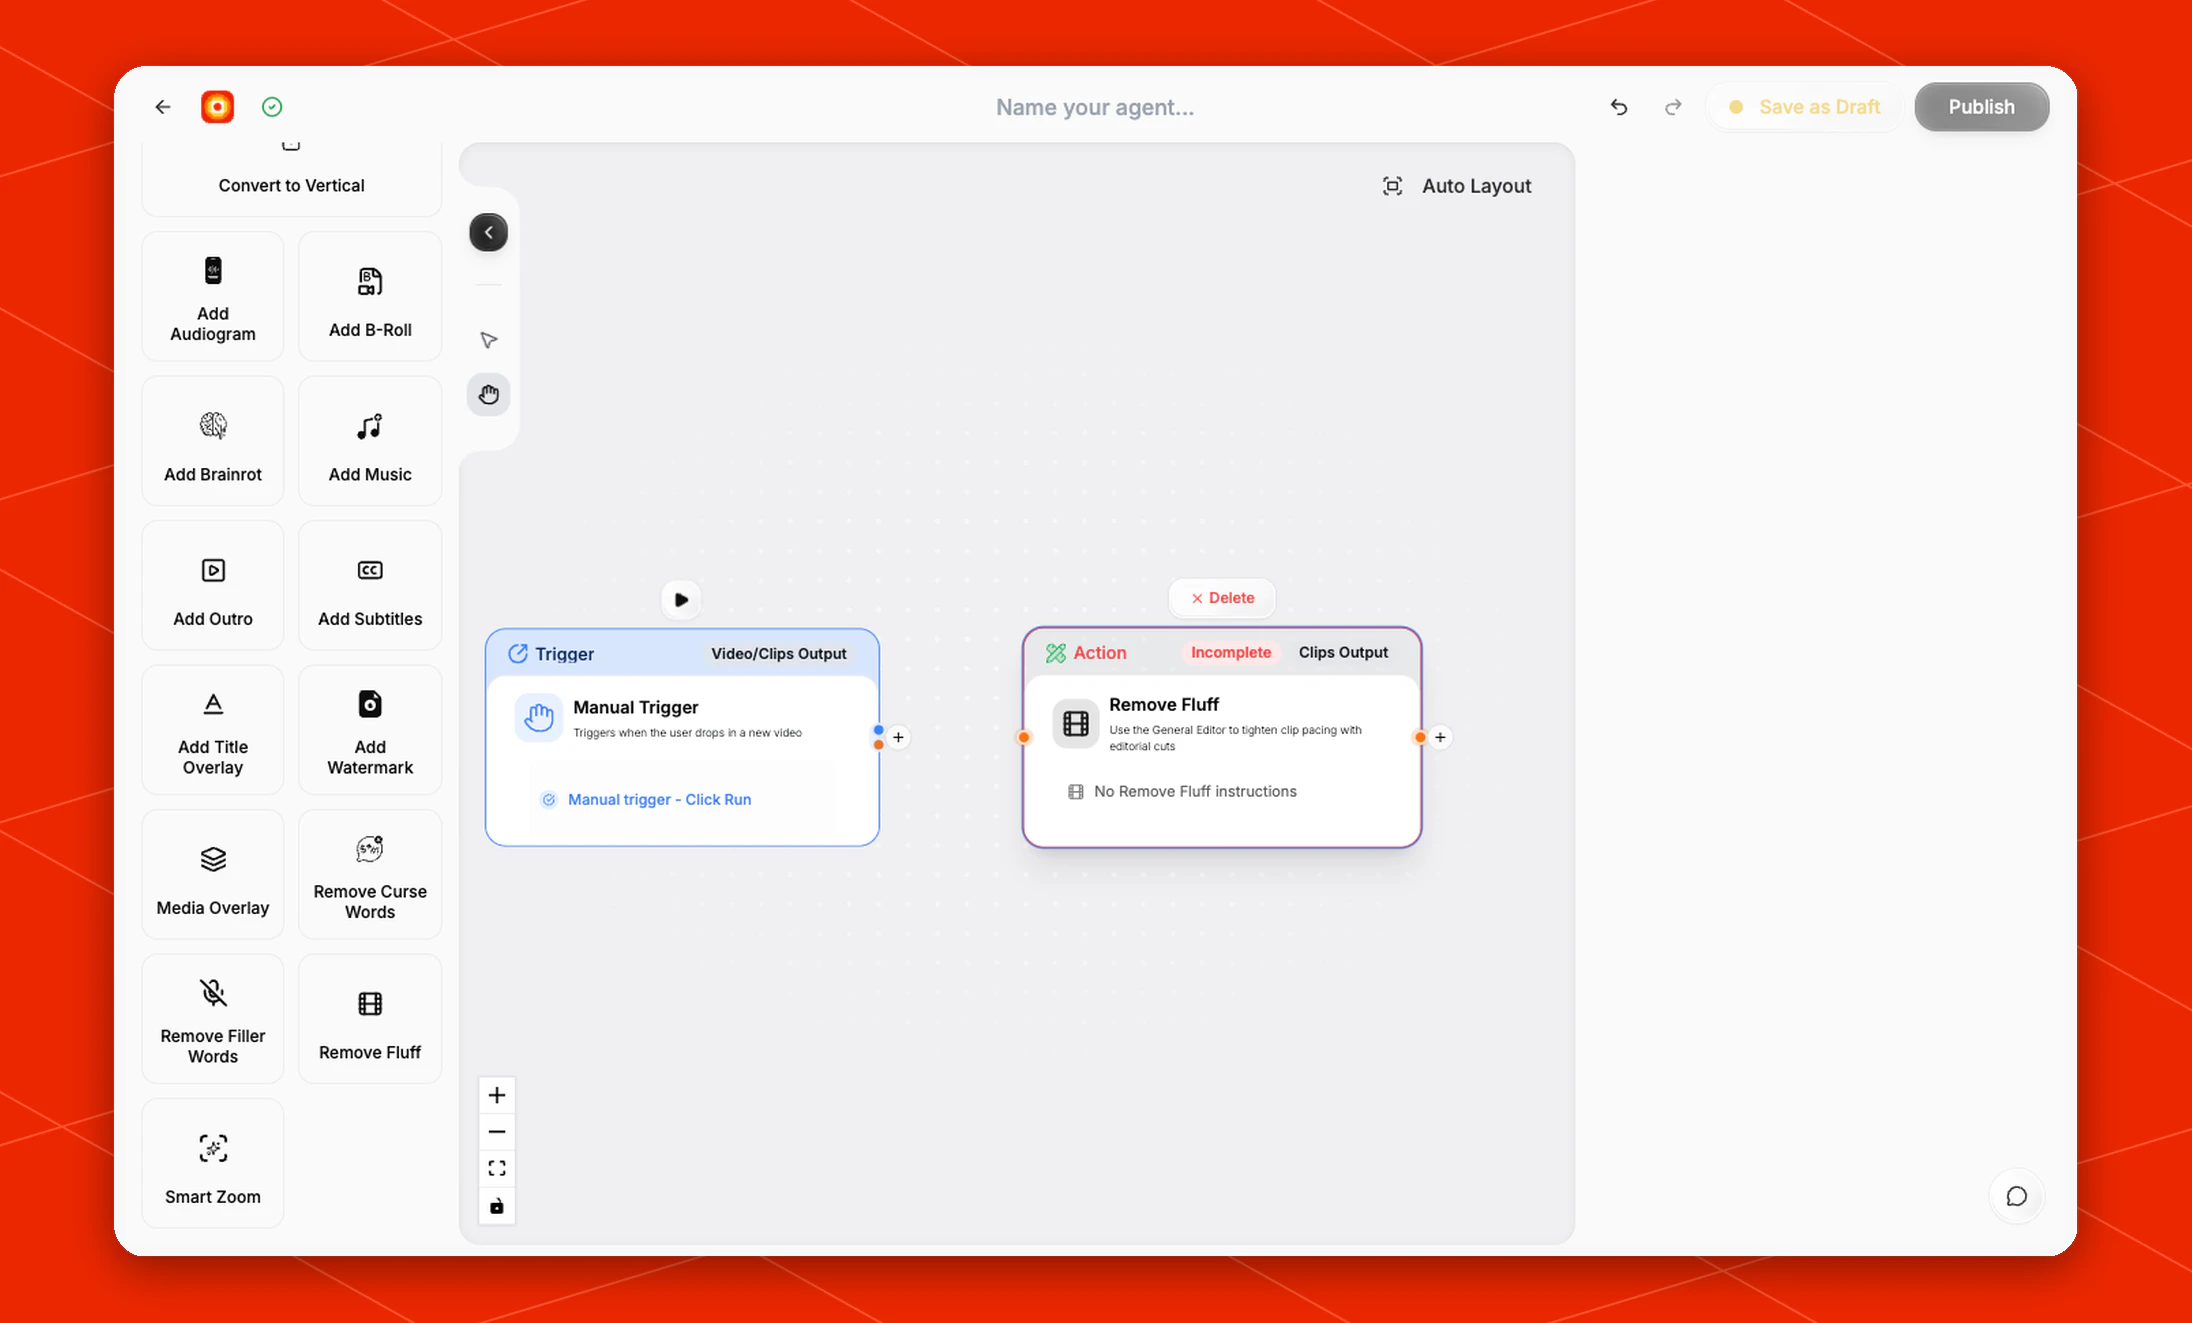
Add a trigger or source node first. When the builder moves to the **Editing** stage, choose **Remove Fluff** from the left node panel. Overlap adds it as an action node on the canvas.
Click the **Remove Fluff** node on the canvas whenever you need to review its state.
 ## Review the node state
The node card describes the action as **Use the General Editor to tighten clip pacing with editorial cuts**.
By default, the card shows **No Remove Fluff instructions** and marks the node as **Incomplete**. Keep the node after the step that produces the clips you want to tighten.
## Place it in the workflow
Use **Remove Fluff** when the clip has the right moment but needs tighter pacing.
For a clip workflow, a common order is:
* **Find Clips** -> **Remove Fluff** -> **Add Subtitles** -> export
For a manual editing workflow, you can place it after **Manual Trigger** and continue into subtitles, reframing, branding, or export.
## Remove fluff in Studio
Open a clip in **Studio**, choose **AI Tools**, and expand **Remove Fluff** under **Video Edits**. Click **Remove Fluff** to analyze the loaded transcript and automatically tighten the clip's timeline.
The edit is applied as a normal Studio timeline change, so use the existing **Undo** and **Redo** controls to review or revert it. Expand **Advanced settings** before running the tool when you want to give the editor a specific instruction.
## Build the rest of the workflow
After Remove Fluff is in place, continue with finishing nodes such as [Add Subtitles](/nodes/subtitles), [Reframe](/nodes/reframe), [Watermarks, Outros, etc.](/nodes/branding), or an export node. Click **Publish** when the workflow is ready to run.
## Review the node state
The node card describes the action as **Use the General Editor to tighten clip pacing with editorial cuts**.
By default, the card shows **No Remove Fluff instructions** and marks the node as **Incomplete**. Keep the node after the step that produces the clips you want to tighten.
## Place it in the workflow
Use **Remove Fluff** when the clip has the right moment but needs tighter pacing.
For a clip workflow, a common order is:
* **Find Clips** -> **Remove Fluff** -> **Add Subtitles** -> export
For a manual editing workflow, you can place it after **Manual Trigger** and continue into subtitles, reframing, branding, or export.
## Remove fluff in Studio
Open a clip in **Studio**, choose **AI Tools**, and expand **Remove Fluff** under **Video Edits**. Click **Remove Fluff** to analyze the loaded transcript and automatically tighten the clip's timeline.
The edit is applied as a normal Studio timeline change, so use the existing **Undo** and **Redo** controls to review or revert it. Expand **Advanced settings** before running the tool when you want to give the editor a specific instruction.
## Build the rest of the workflow
After Remove Fluff is in place, continue with finishing nodes such as [Add Subtitles](/nodes/subtitles), [Reframe](/nodes/reframe), [Watermarks, Outros, etc.](/nodes/branding), or an export node. Click **Publish** when the workflow is ready to run.