Build, organize, and publish the workflows that power your clip creation
What is a workflow?
A workflow is the automation you use to turn source content into publish-ready outputs inside Overlap. Each workflow combines three layers:- A trigger that tells Overlap when to start
- Editing logic that shapes the clip
- An export step that defines what gets produced
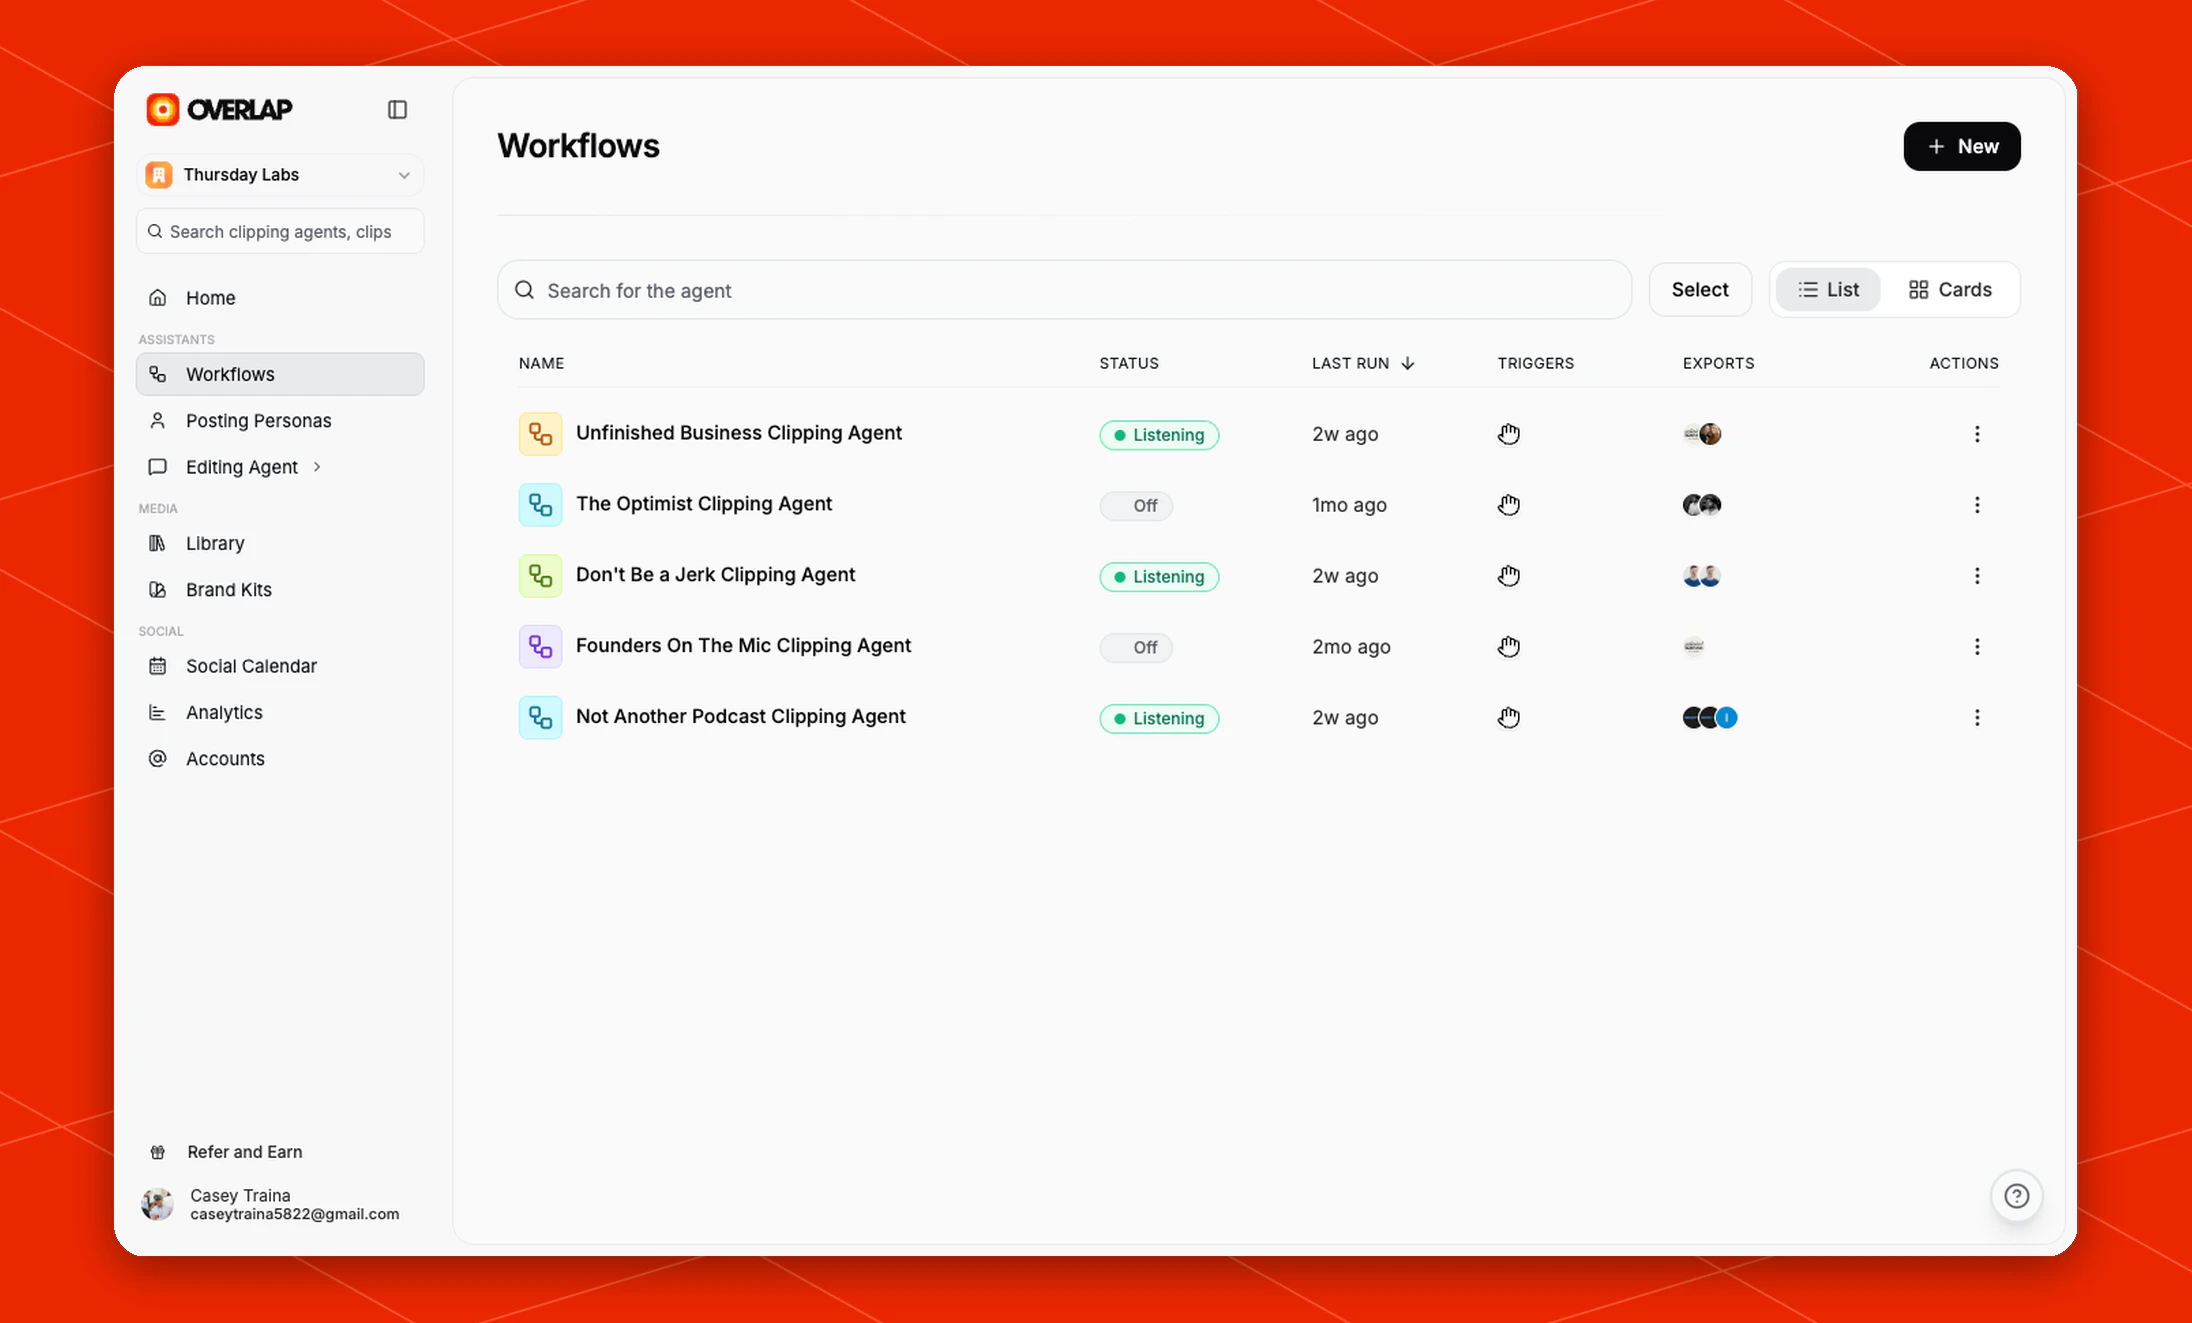
Managing your workflows
Open Workflows from the left sidebar to see every workflow in your workspace. From this screen you can:- Search for a workflow by name
- Create a new workflow with New
- Switch between List and Cards views
- Use Select for bulk actions
- Review each workflow’s status, last run, triggers, and exports
Creating a workflow
Click New in the top-right corner of the workflows page to open the workflow builder. The builder is organized into three core stages:- Trigger
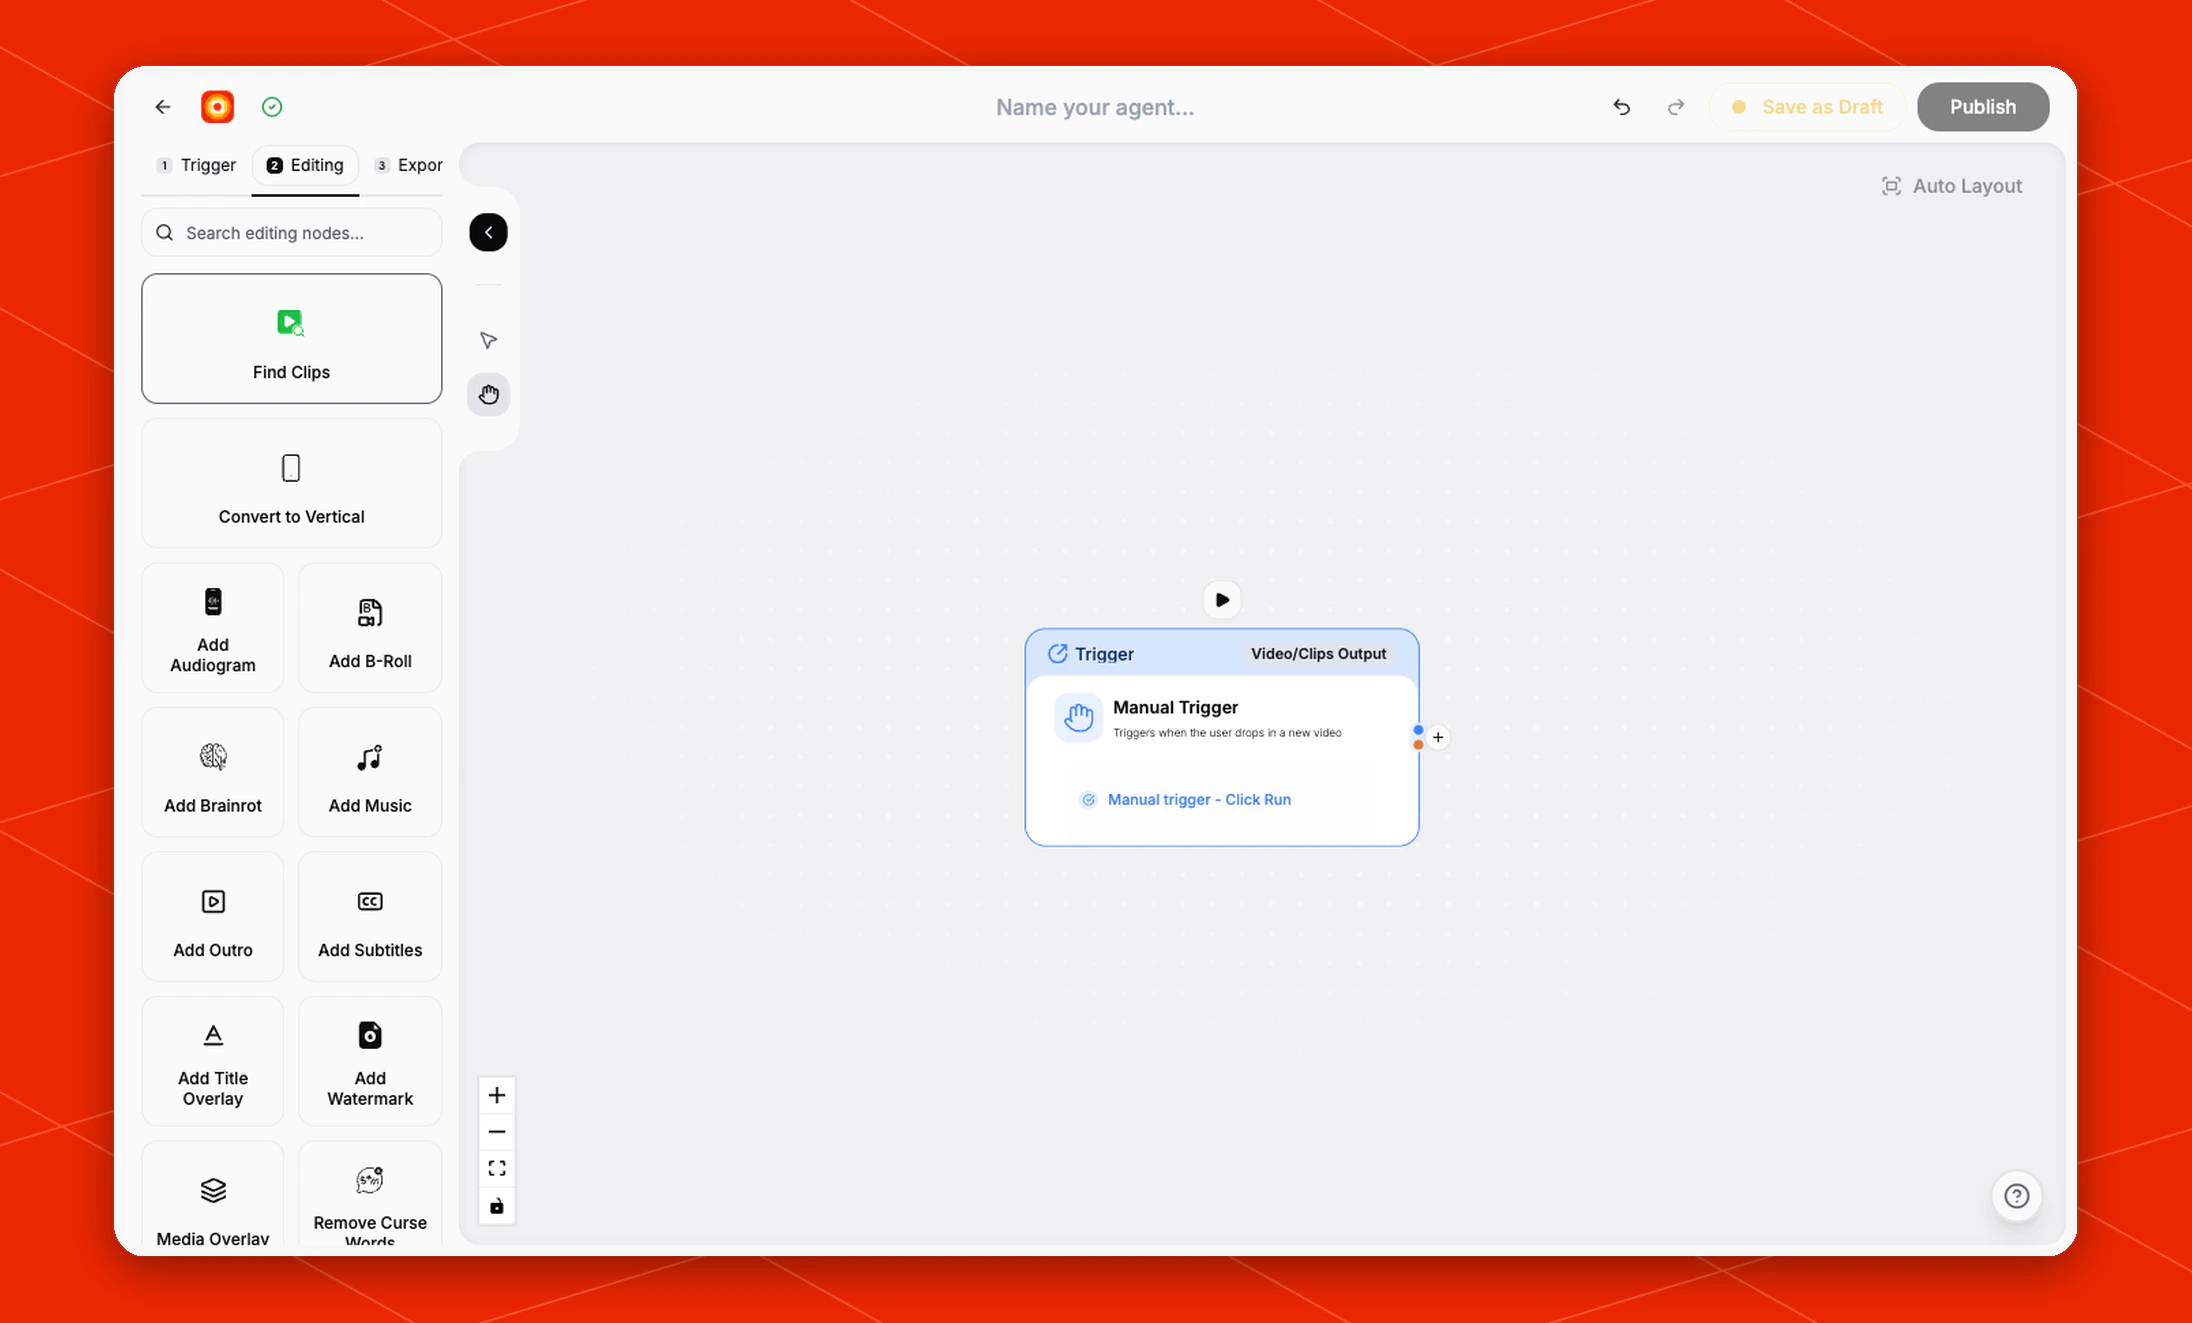
- Editing
- Export
- How does it start?
- What should happen to the content?
- What should Overlap produce at the end?
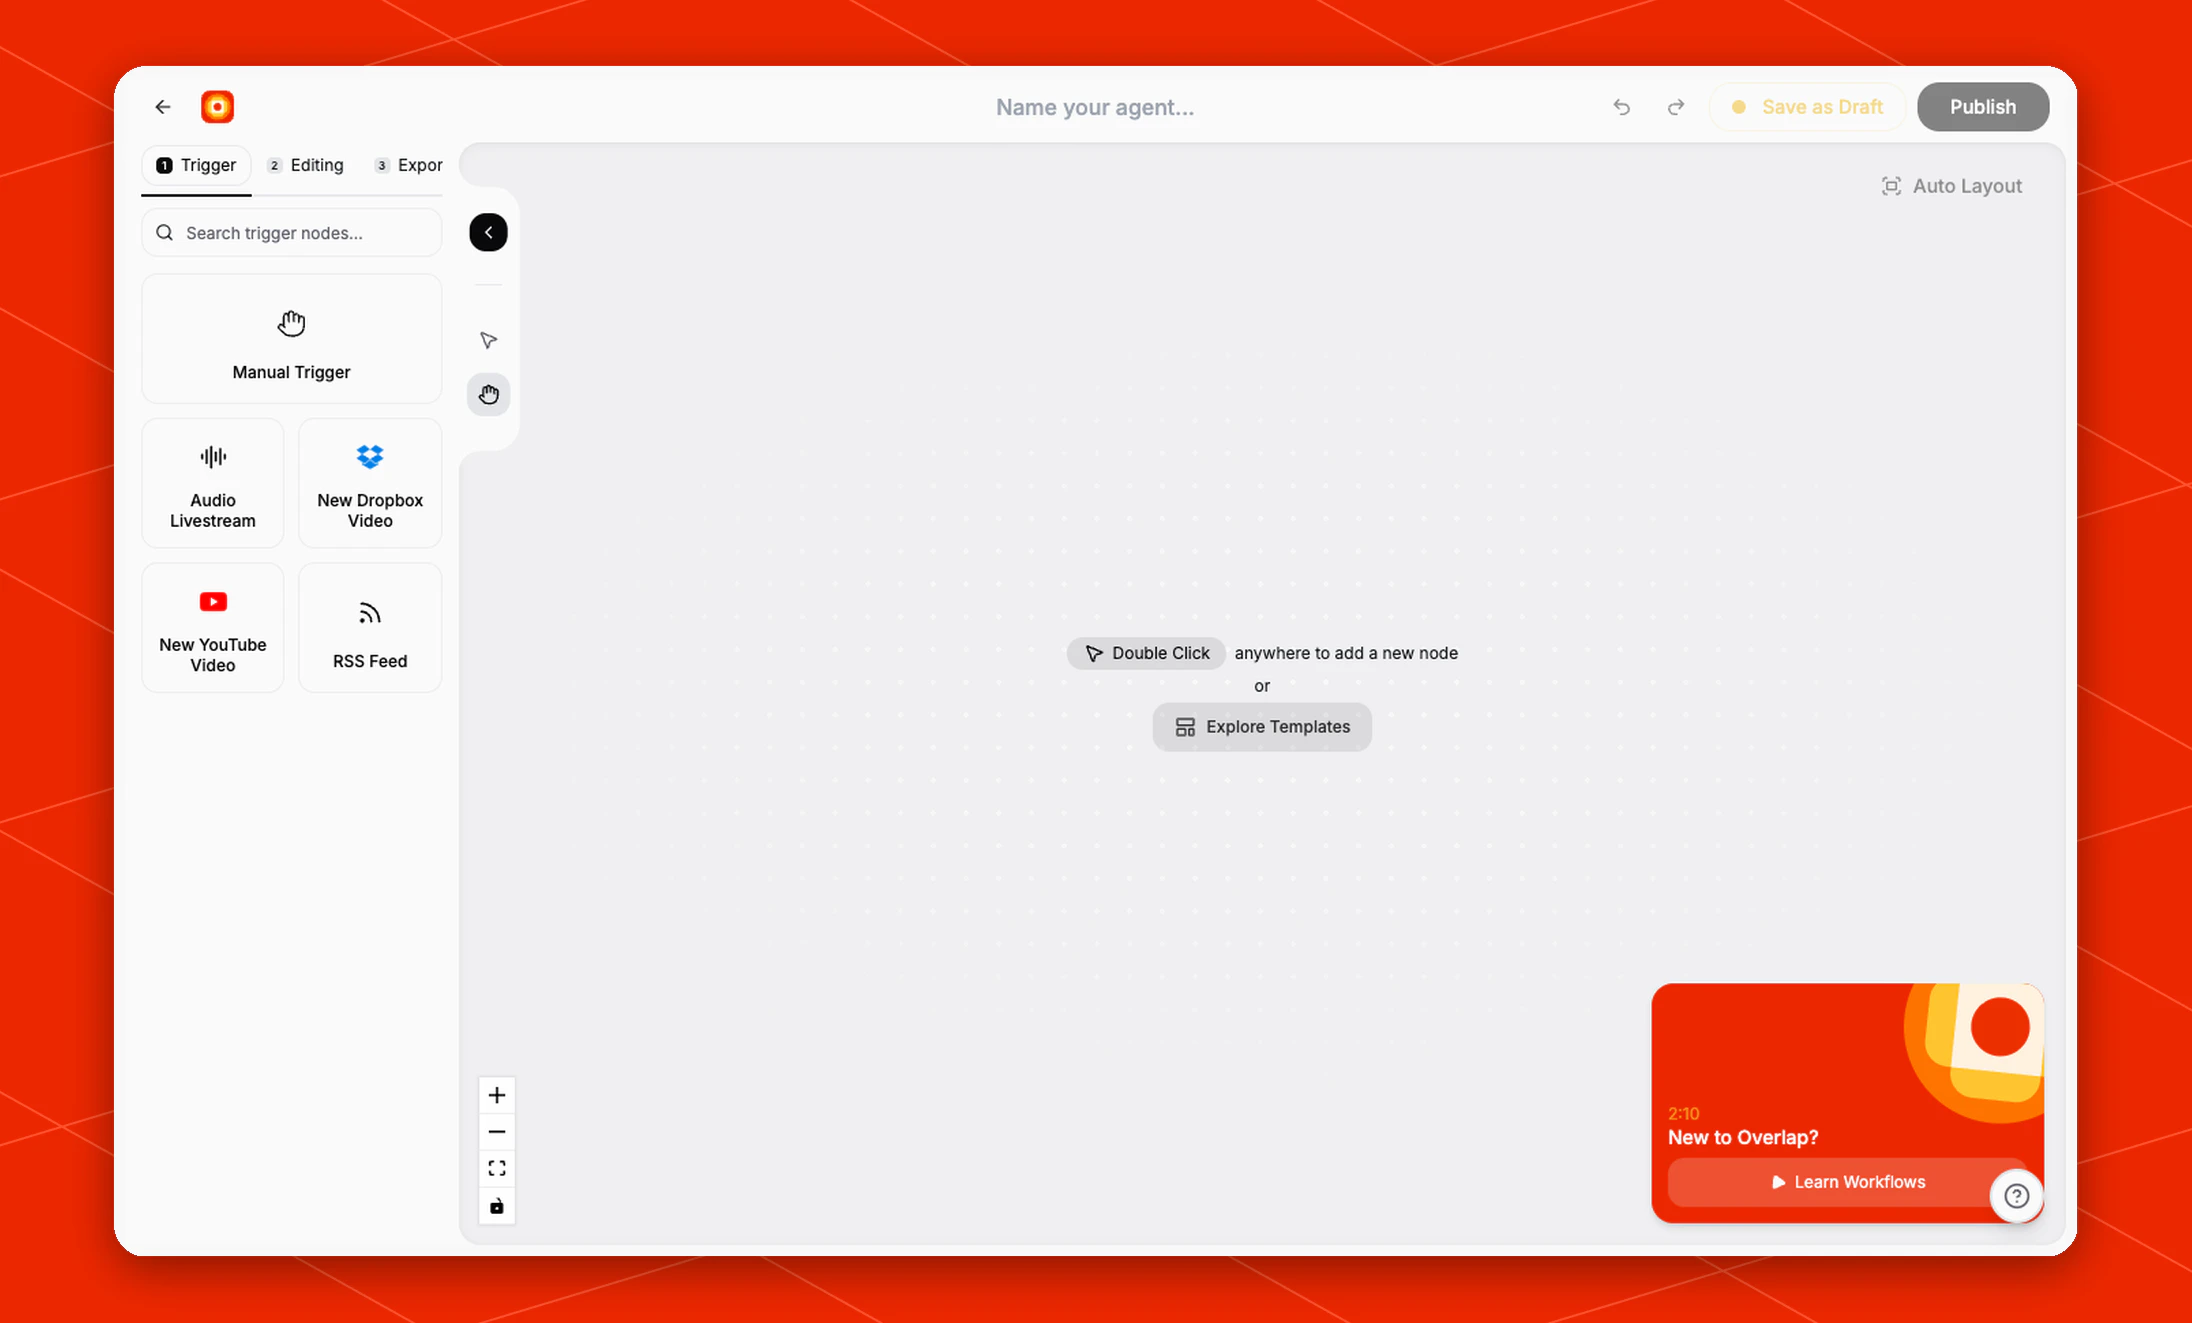
Choosing how the workflow starts
The first step is your trigger. This determines what wakes the workflow up. In the current builder, the trigger panel includes options such as:- Manual Trigger
- Audio Livestream
- New Dropbox Video
- New YouTube Video
- RSS Feed
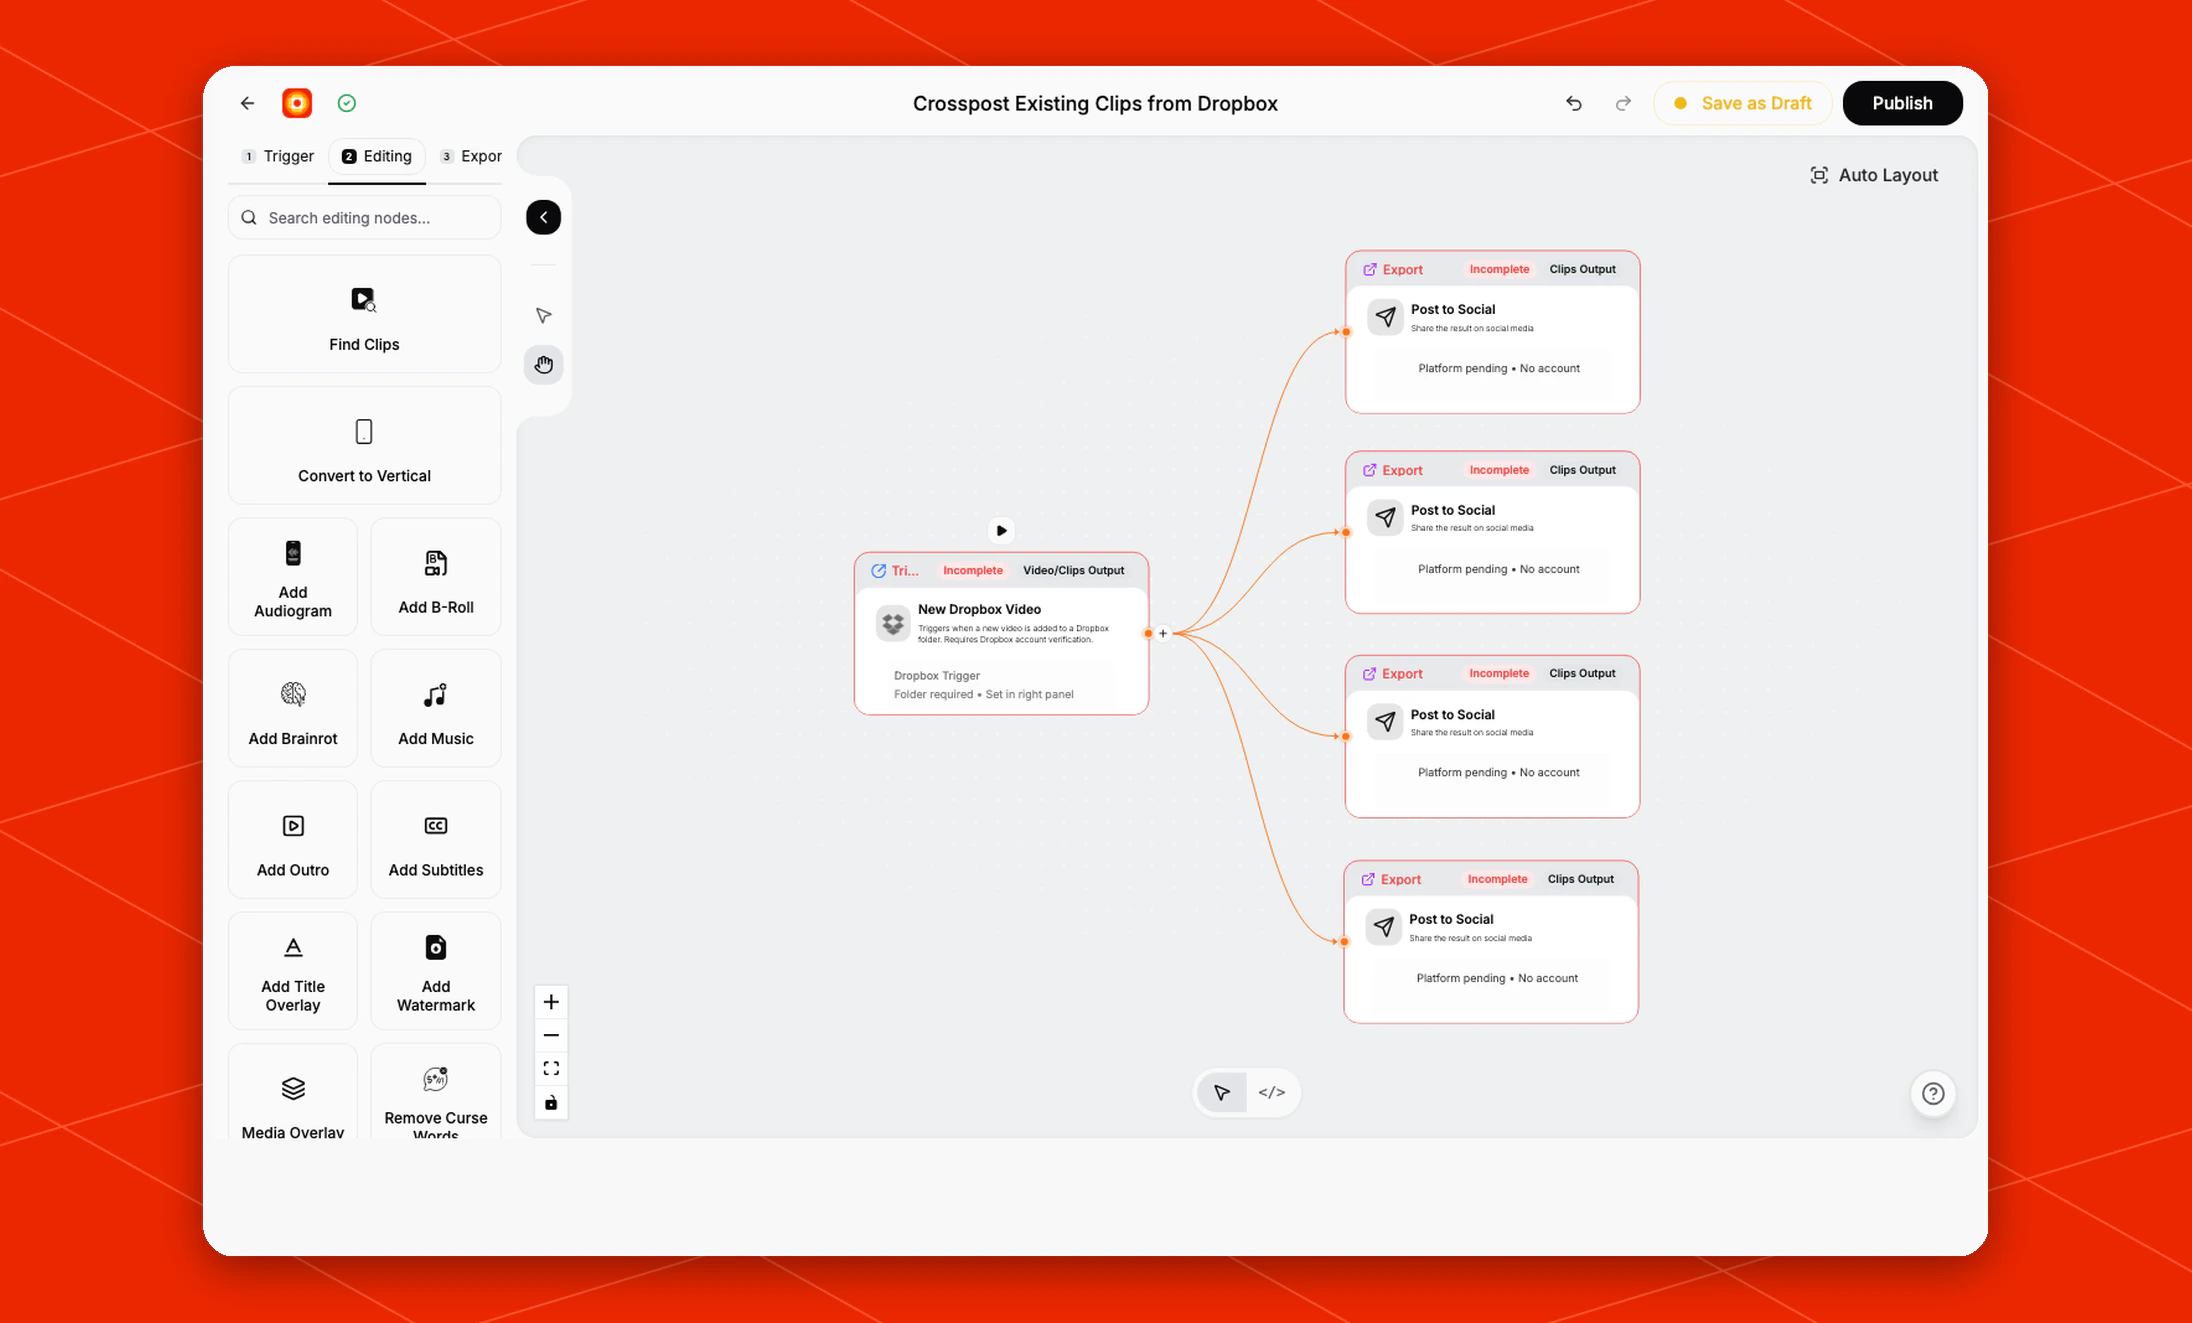
Building the flow
After choosing a trigger, move through the Editing and Export stages to shape the final result. You can build from scratch or use the canvas helpers already in the builder:- Double Click anywhere on the canvas to add a new node
- Explore Templates if you want to start from a prebuilt structure
Connecting nodes together
Once you add nodes to the canvas, connect them in the order you want Overlap to run them. A good way to think about it is:- The trigger starts the workflow
- Each downstream node performs the next step
- The final connected nodes define what gets exported at the end
Saving and publishing
In the top-right corner of the builder, you can save the workflow in different states:- Save as Draft keeps your progress without turning the workflow on
- Publish makes the workflow live so it can begin listening for its trigger
A practical workflow setup
A common pattern is to create separate workflows for different content goals, for example:- One workflow for long-form episode clipping
- One workflow for short-form social content
- One workflow for a specific ingestion source like YouTube, Dropbox, or RSS
Book a workflow demo
See how Overlap can turn your content pipeline into a repeatable workflow.