
Use nodes to decide how a workflow starts, what happens to the content, and where the finished result goes
What nodes are
A node is one step in your workflow. You add nodes to the workflow canvas, connect them in order, and Overlap runs that path from input to output. A simple workflow might start with a source like YouTube or RSS, pass through clip-selection and editing nodes, and finish with an export like social posting or email.You may still see older
clipping agent language in some parts of the product. In the current docs, we use workflow for the automation and node for each step inside it.Where to add nodes
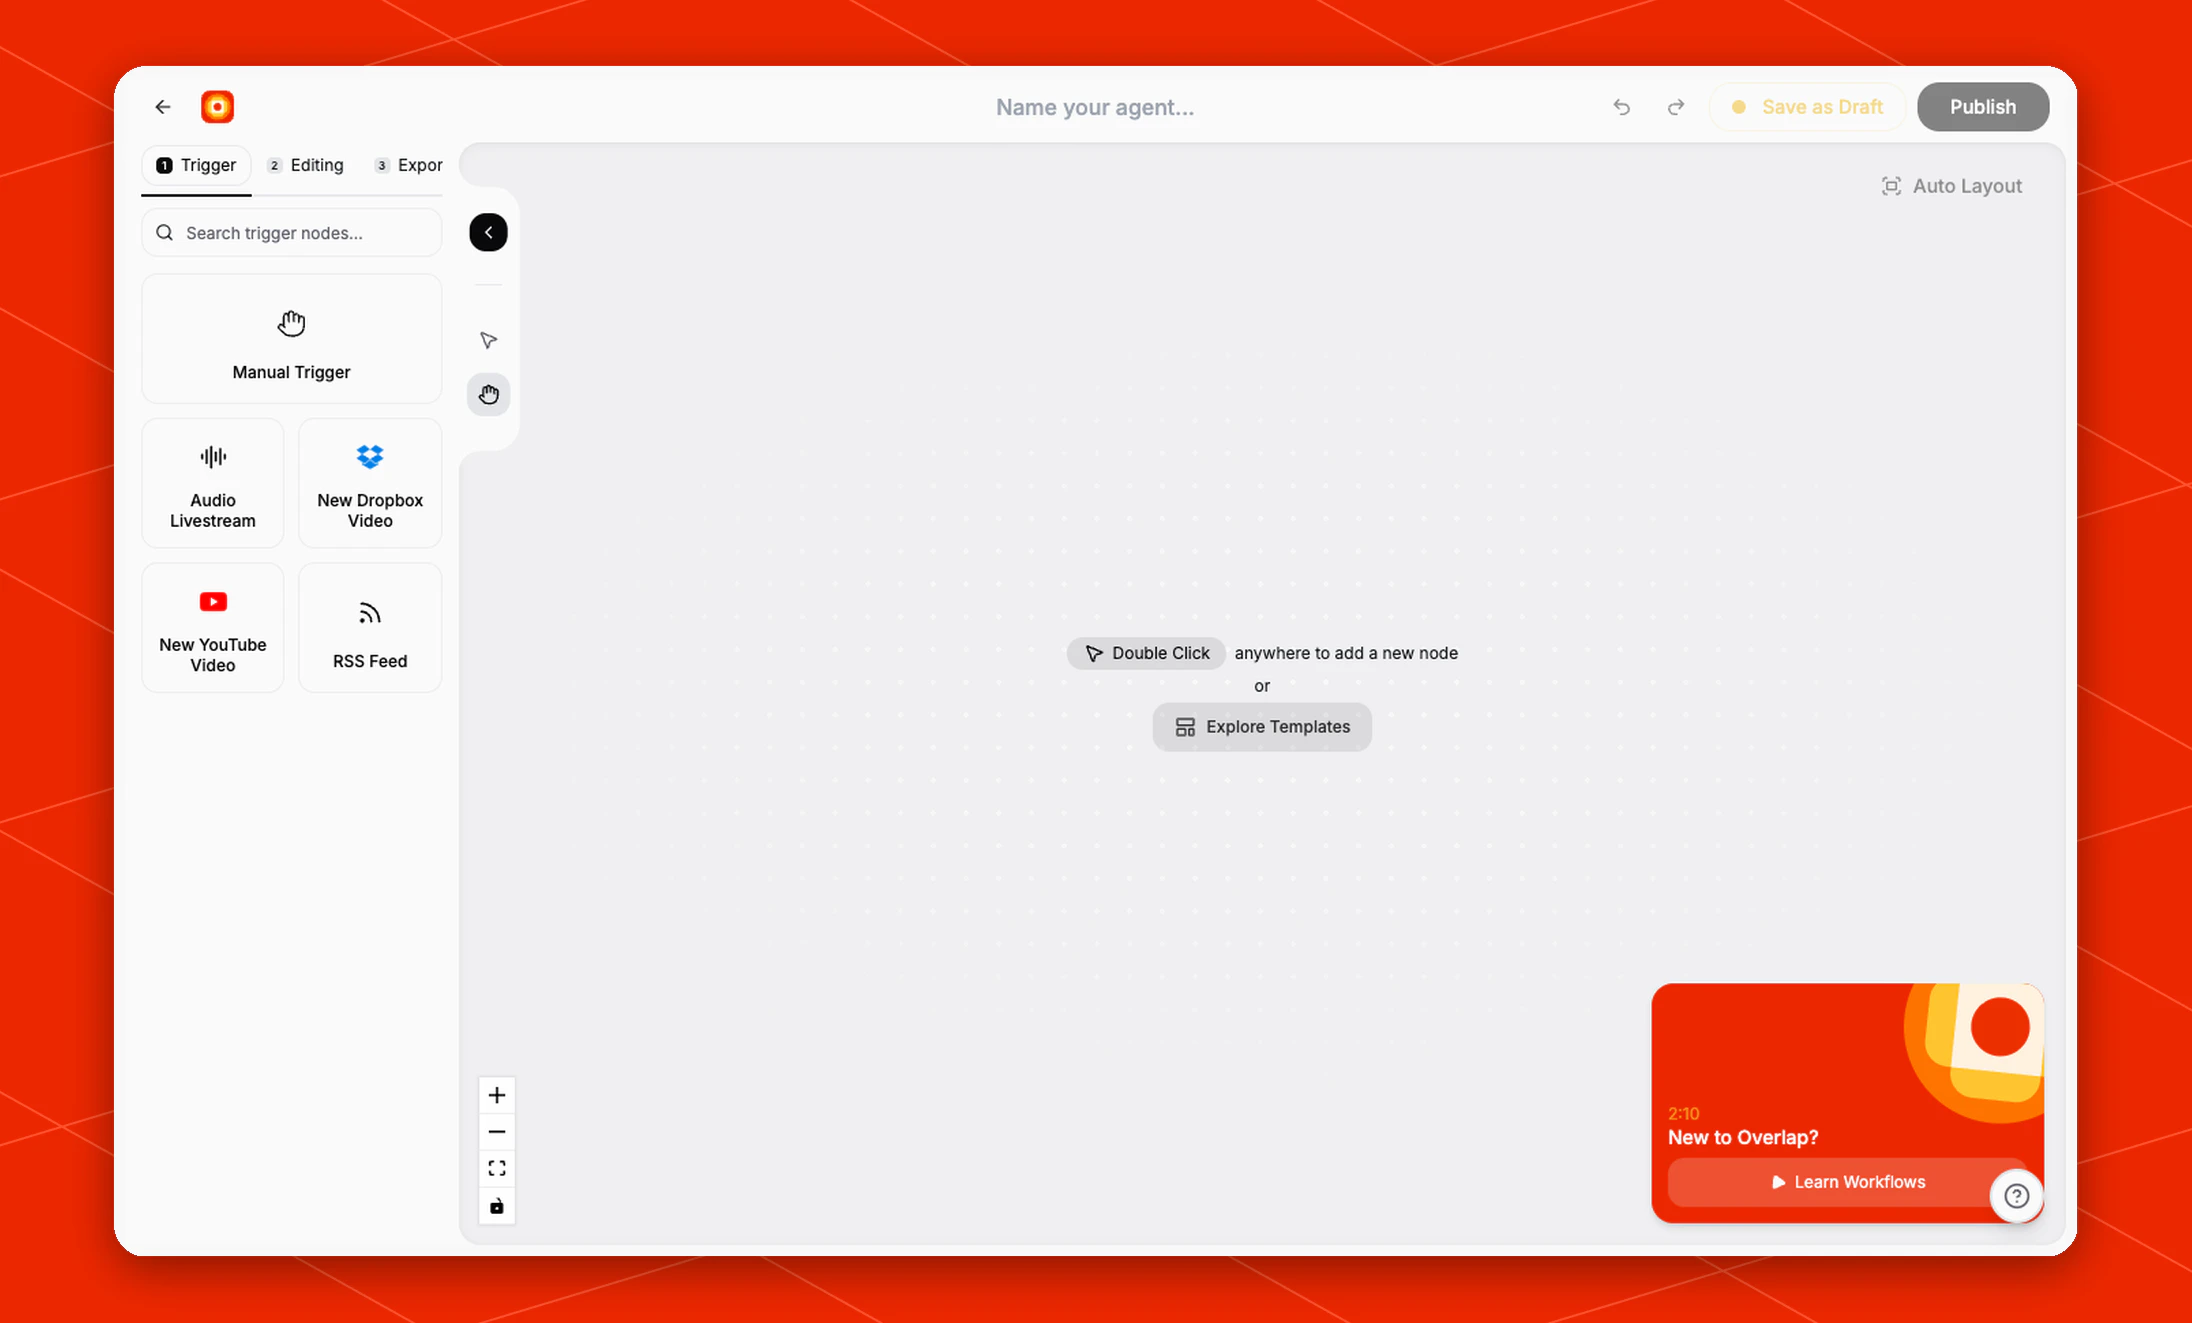
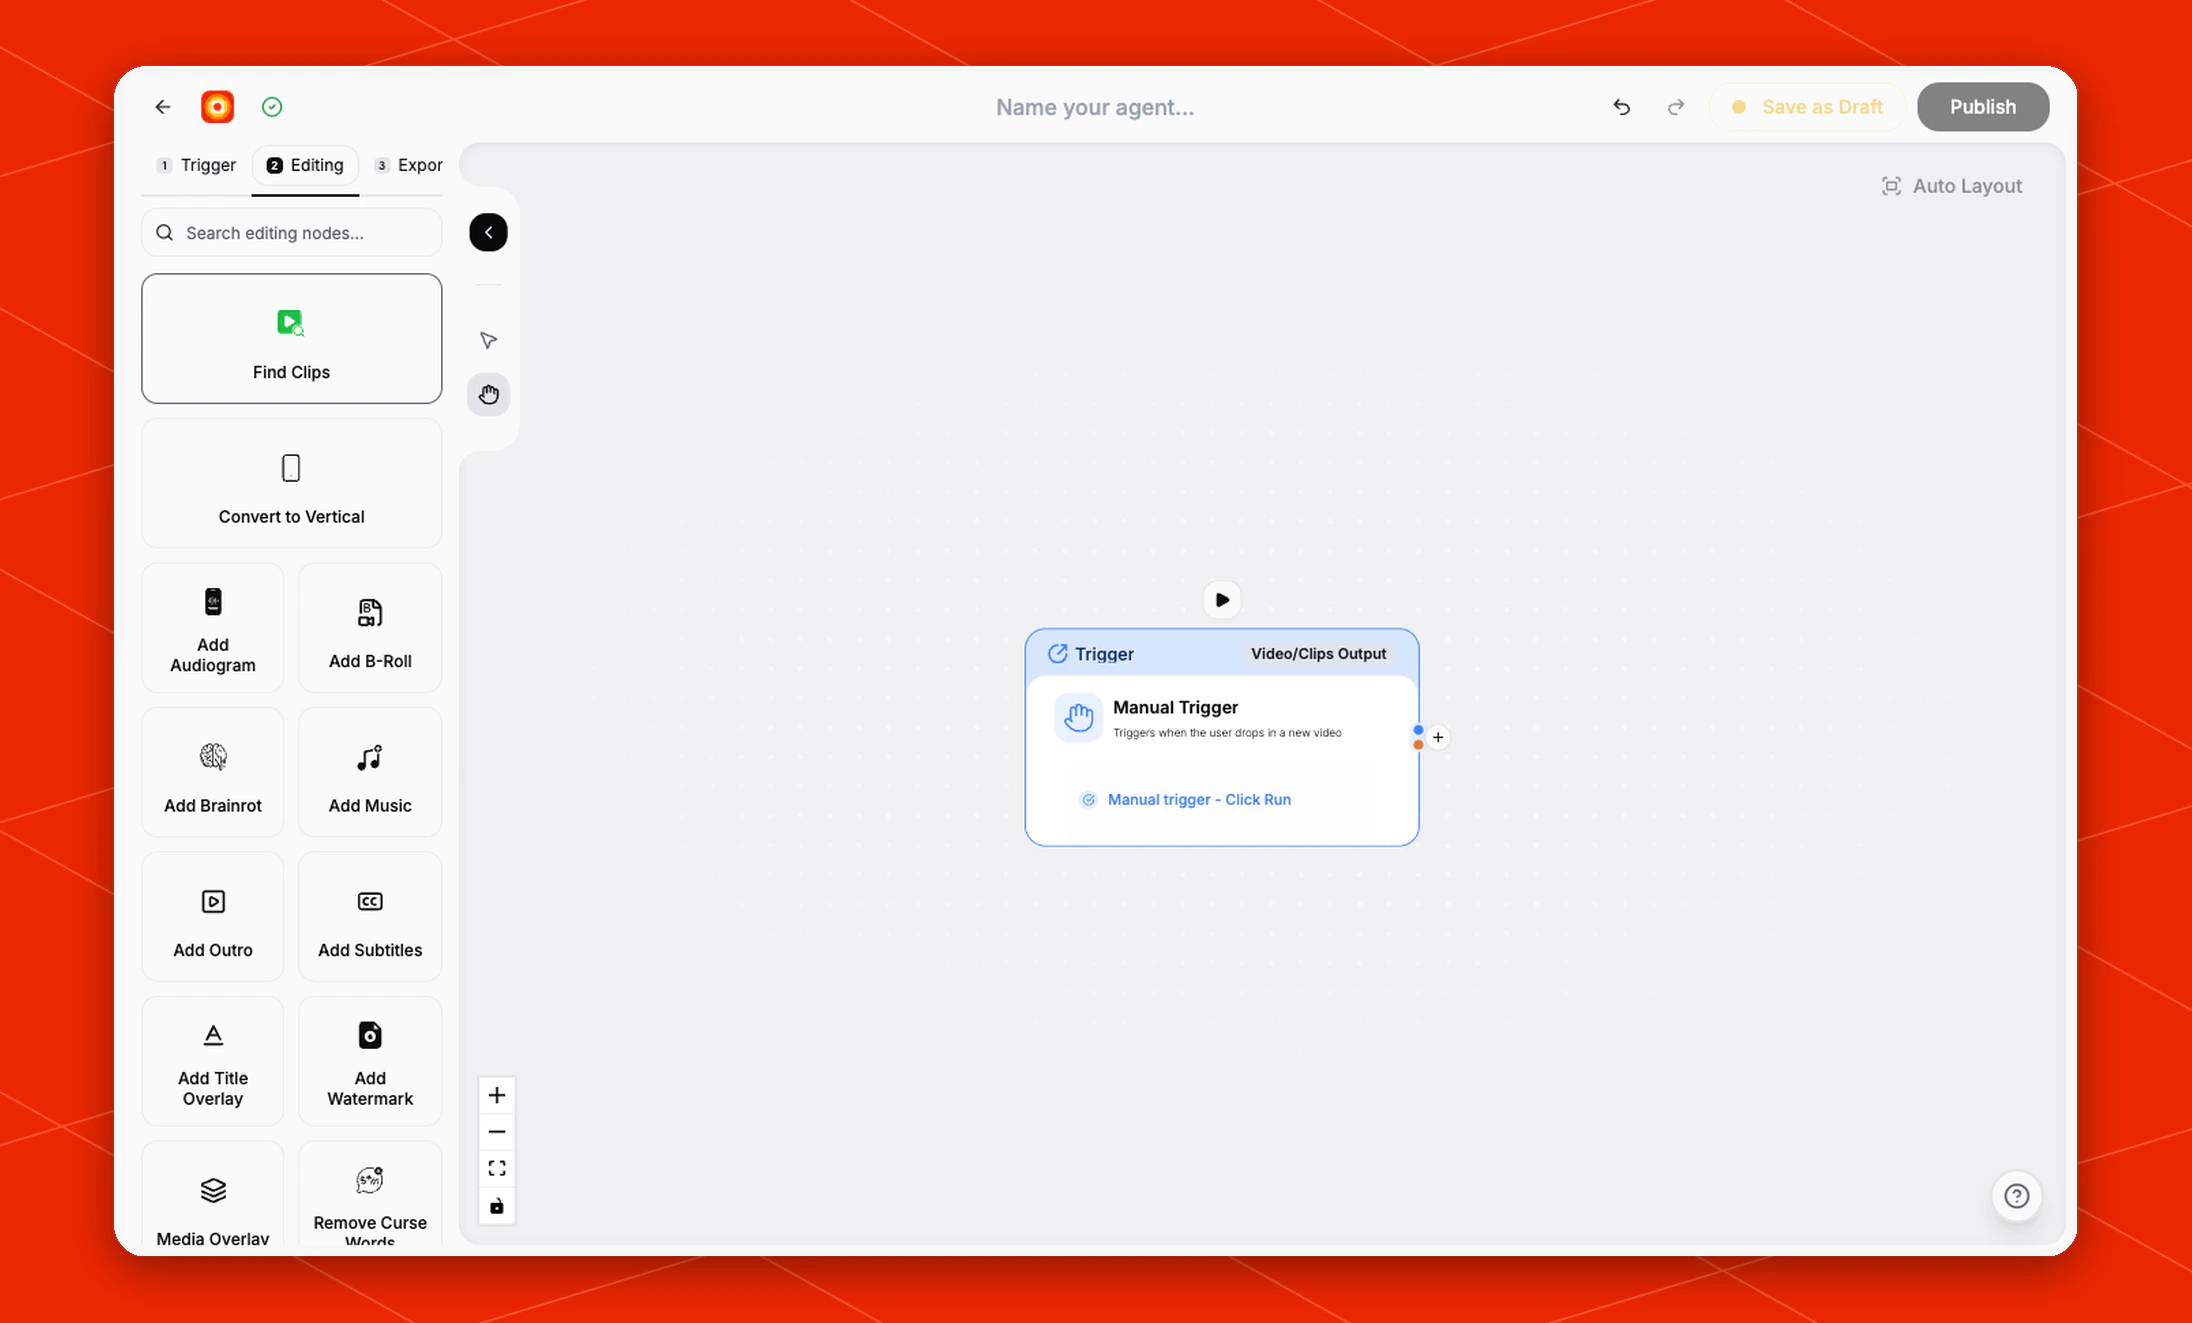
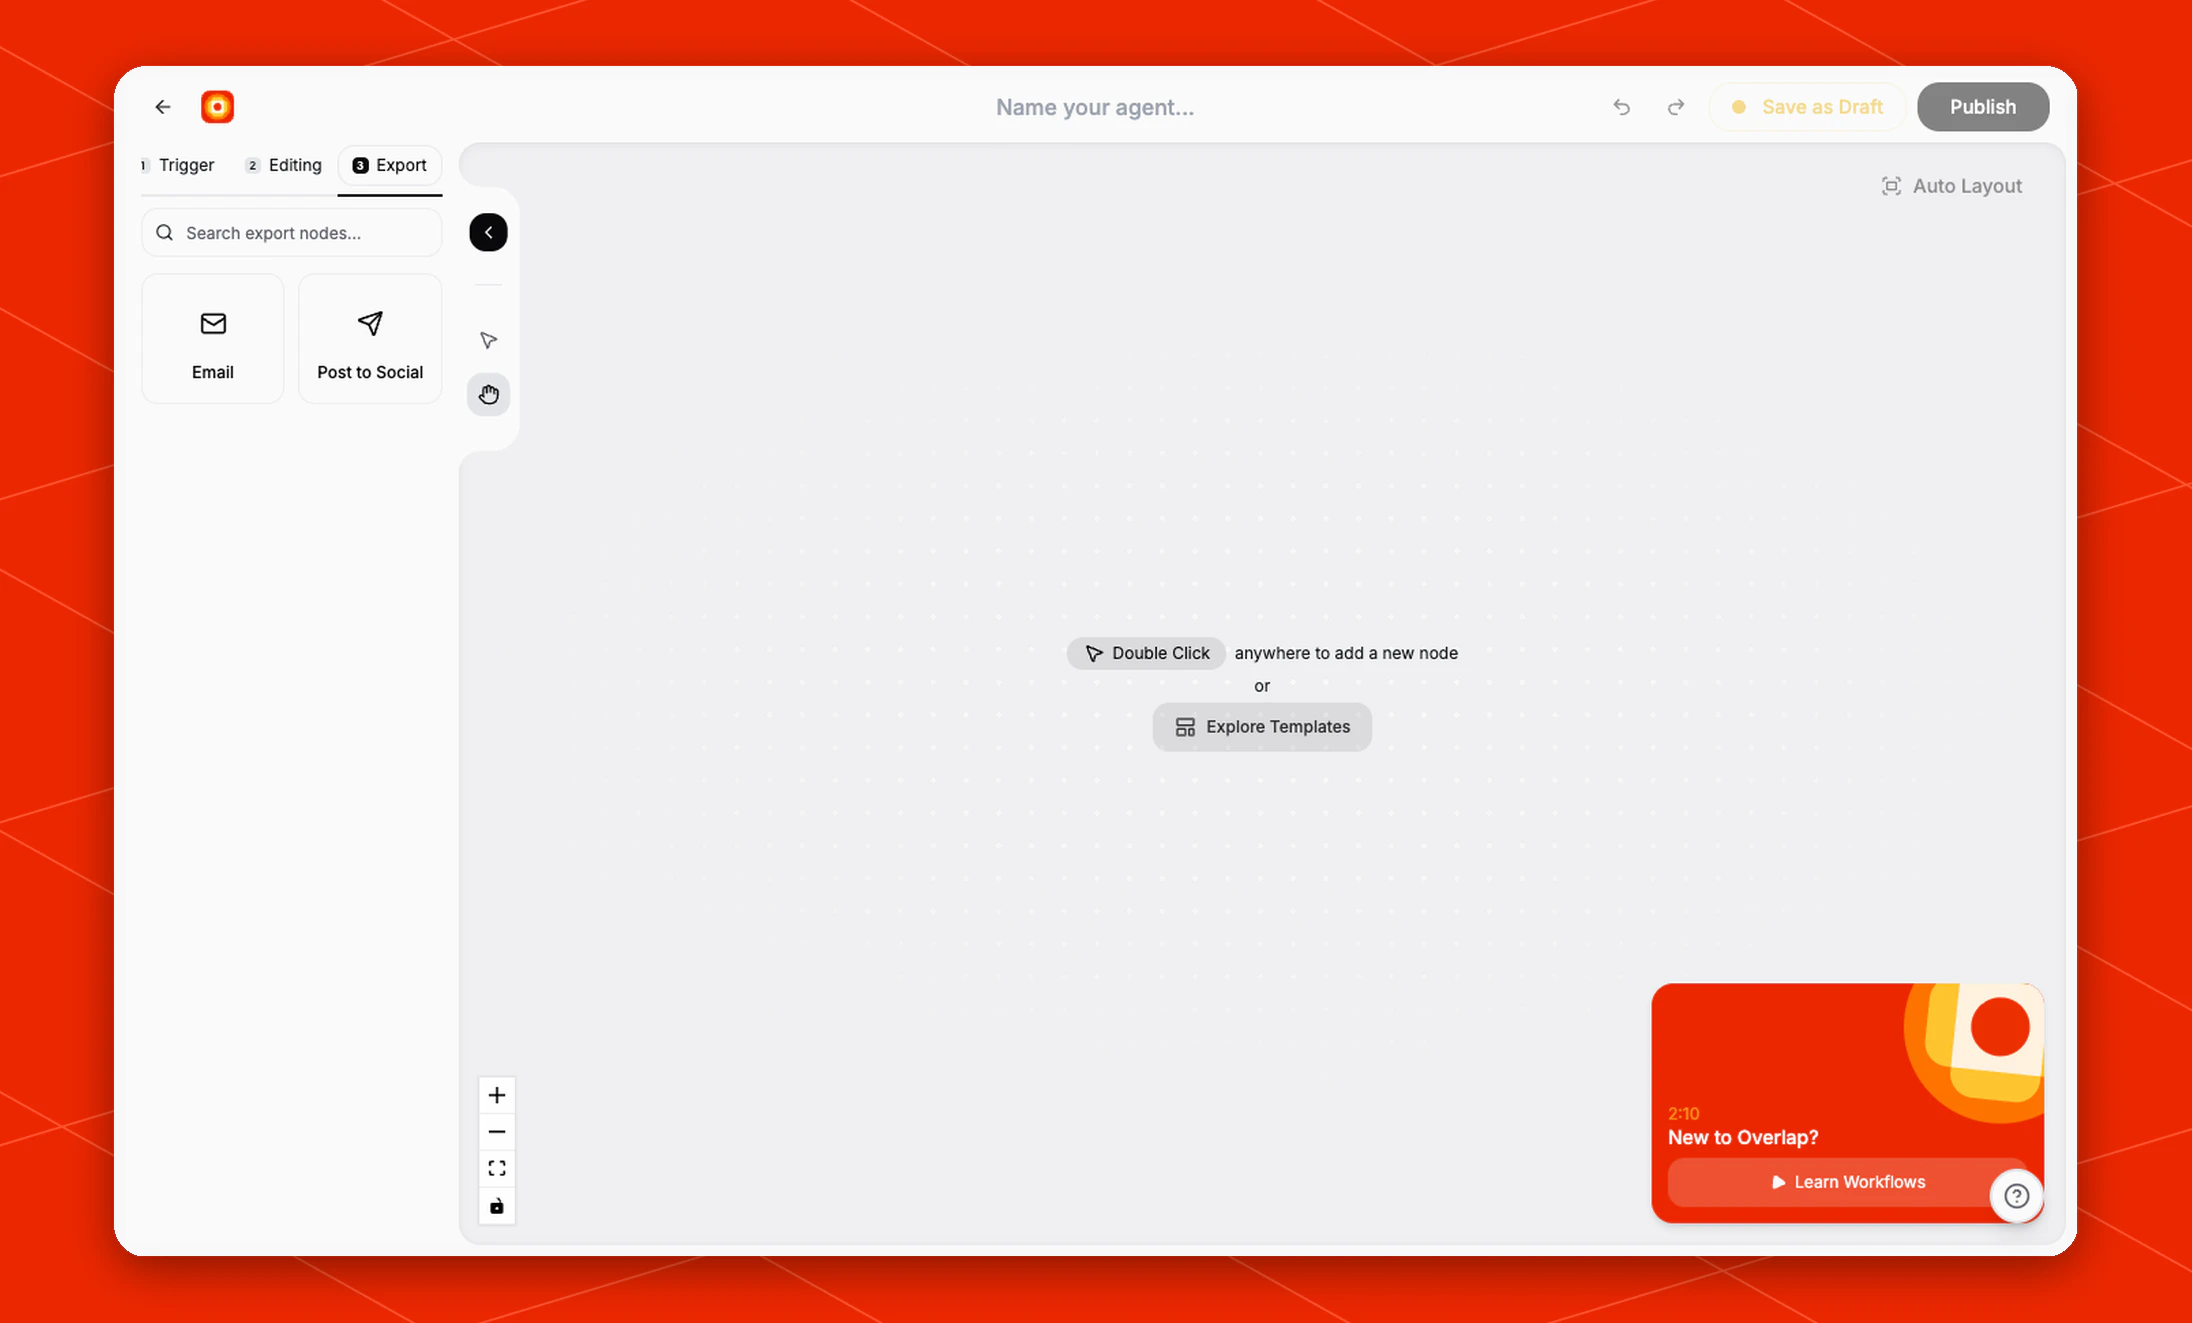
Open Workflows from the left sidebar and click New to open the builder. The current builder is organized into three stages:- Trigger
- Editing
- Export
Trigger nodes
Trigger nodes decide what starts the workflow. In the current builder, the Trigger stage includes options such as:- Manual Trigger
- Audio Livestream
- New Dropbox Video
- New YouTube Video
- RSS Feed
Editing nodes
Editing nodes shape the clip after the workflow has a source. This is where you tell Overlap what moments to find, how the video should look, and what should be added before export. Common editing nodes documented in this section include:- Find Clips
- Style Video
- Remove Fluff
- Remove Filler Words
- Remove Curse Words
- Smart Zoom
- Reframe
- Split
- Ask AI
- Audiogram
- Add Music
- Delay
Export nodes
Export nodes decide what Overlap does with the finished output. In the current builder, the Export stage includes options such as:- Post to Social
A common node flow
One practical way to think about nodes is:- A trigger brings content into the workflow
- Editing nodes decide what clips get created and how they look
- An export node sends the finished result somewhere useful
- New YouTube Video -> Find Clips -> Style Video -> Post to Social
- New YouTube Video -> Find Clips -> Remove Fluff -> Style Video -> Post to Social
- Manual Trigger -> Find Clips -> Split -> different editing or export branches
- Manual Trigger -> Find Clips -> Ask AI -> answer-specific editing or export branches
- Manual Trigger -> Remove Filler Words -> Remove Curse Words -> Smart Zoom -> Style Video -> Email
- RSS Feed -> Find Clips -> Style Video -> Email
Keep exploring
Trigger Nodes
Start a workflow from YouTube, RSS, Dropbox, audio livestreams, or a manual run.
Find Clips
Guide Overlap toward the moments you want it to surface from each source.
Style Video
Add subtitles, titles, graphics, an outro, and color grading in one node.