Use the Reframe editor in Studio to control how each scene is cropped into vertical, either as a fixed crop or an animated camera move.
Opening the Reframe editor
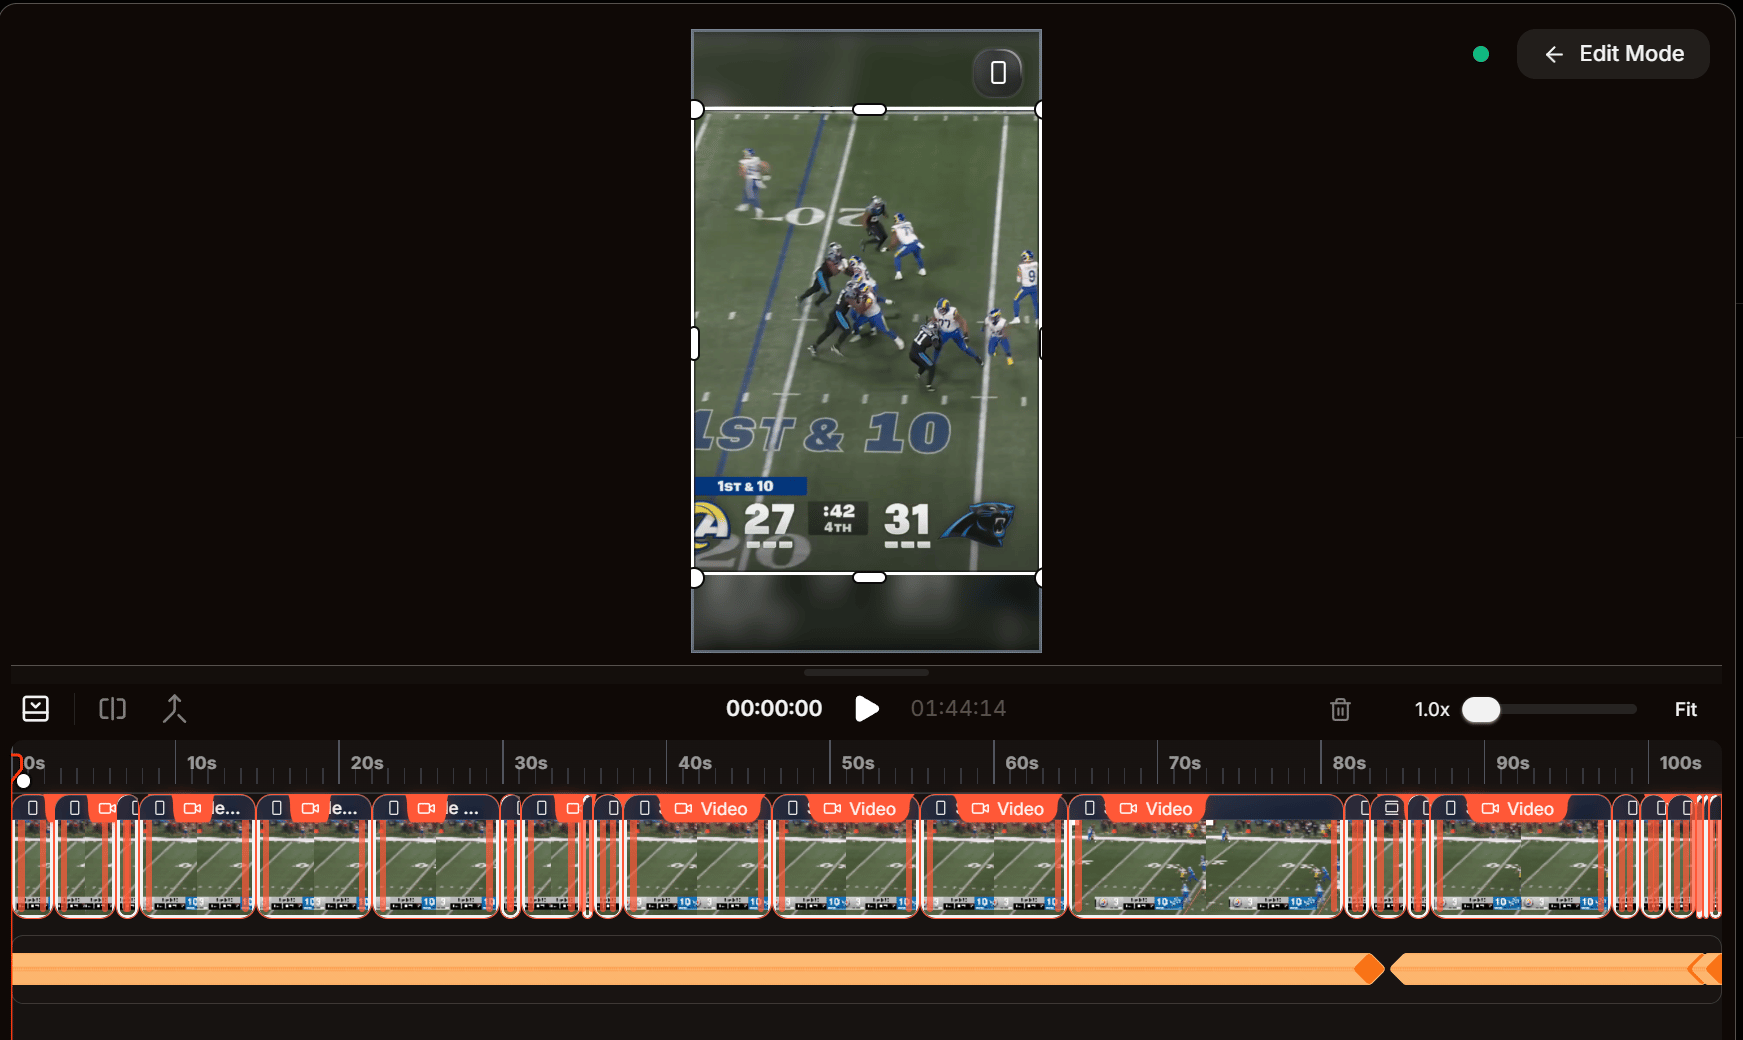
The Reframe editor lives inside Studio. Open a clip and click Reframe beside the preview to enter Edit Mode.
The clip is split into scenes, and each is reframed independently. Whatever scene the playhead is in is the scene the right-side panel edits, so move the playhead to switch scenes.
Static vs. Pan
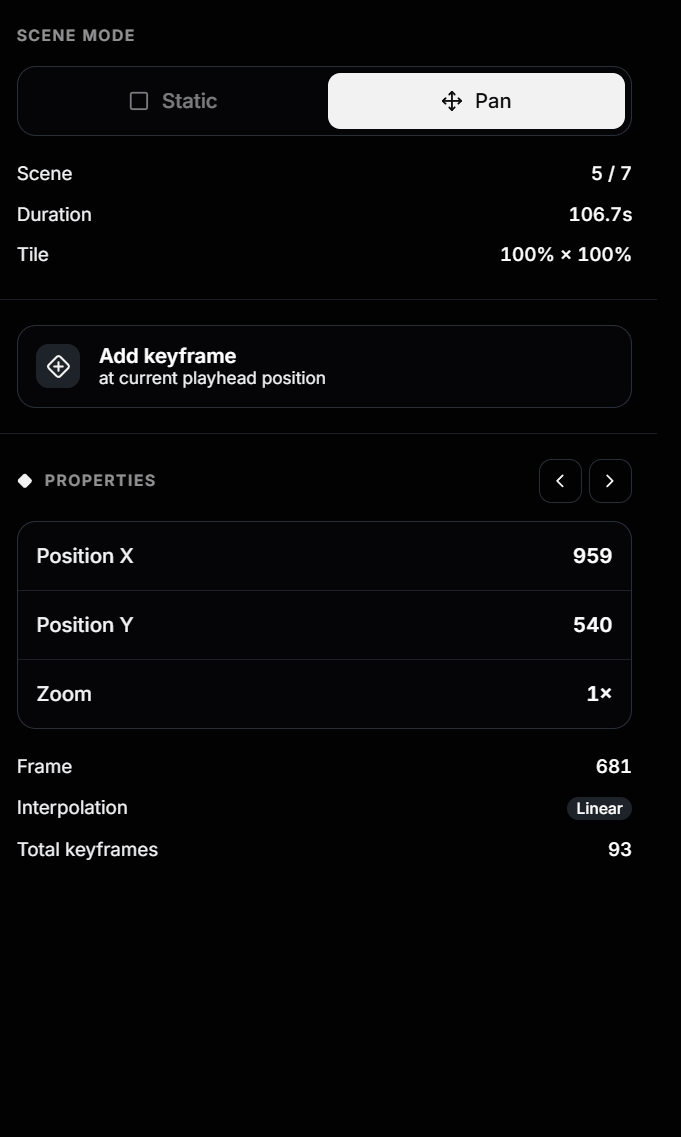
Scene Mode at the top of the panel decides how the current scene’s crop behaves over time.
- Static — one fixed crop for the whole scene. Set Position X, Position Y, and Zoom once. Best for steady shots; there are no keyframes in this mode.
- Pan — an animated camera move driven by keyframes, which Overlap smoothly interpolates between. Best when the subject moves or you want a push-in. The
Add keyframe and keyframe-navigation controls only appear here.
Switching a scene from Pan to Static collapses its movement into a fixed crop. Switching back re-enables keyframe editing.
Keyframes
Each keyframe pins a crop Position X, Position Y, and Zoom to a single frame. As the clip plays, Overlap animates the crop between them. A scene needs at least two keyframes to move.
Add a keyframe: in Pan mode, scrub to the frame you want, reframe the crop, and click Add keyframe (it’s created at the playhead).
Edit a keyframe: move the playhead onto it — the Properties header then shows which keyframe you’re on (e.g. Keyframe 3 of 6 in scene). If the playhead isn’t on a keyframe, the panel prompts you to move onto one. Adjust each value by dragging to scrub or clicking to type:
| Property | What it controls |
|---|
| Position X | Horizontal center of the crop (source pixels). Higher moves right. |
| Position Y | Vertical center of the crop (source pixels). Higher moves down. |
| Zoom | How tight the crop is. 1× is widest; larger pushes in. Minimum 1×. |
Linear), and Total keyframes for the clip.
Navigate and delete: use the ‹ / › arrows in the Properties header to jump between keyframes. Select keyframes to reveal the Delete bar at the bottom of the panel.
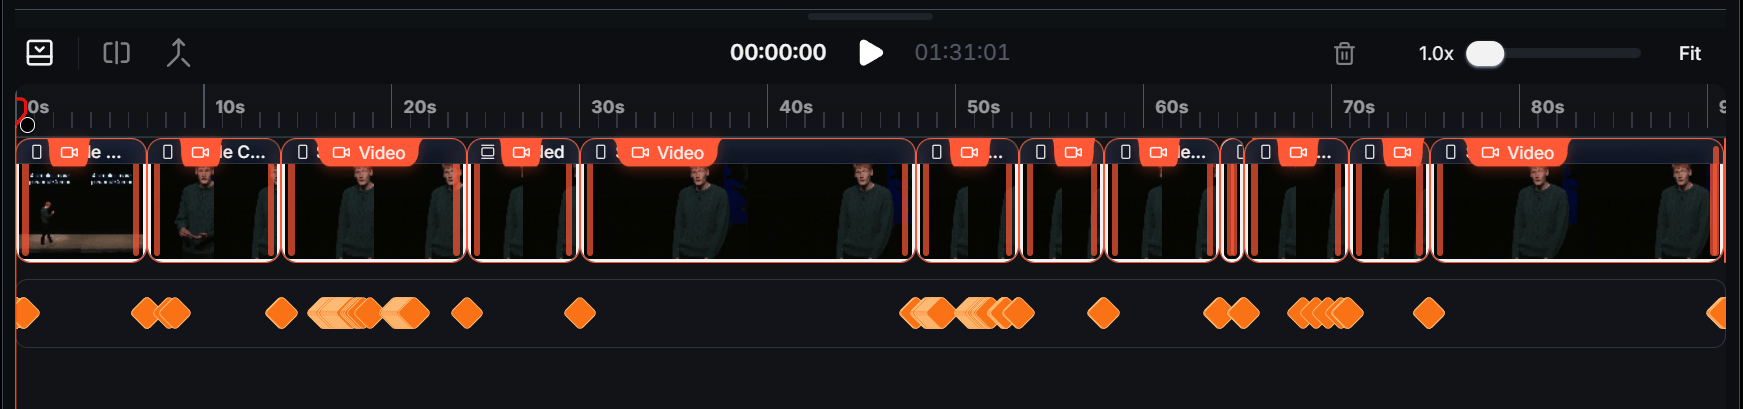
Reading the keyframe timeline
The timeline under the preview stacks the scene strip on top and keyframe diamonds below.
- Each tile in the top row is one scene.
- Each diamond below is a keyframe; clusters mean several close together.
- The playhead selects the scene the panel edits. Use the zoom /
Fit control (top right) to spread out tightly packed keyframes.
A practical reframing flow
- Click
Reframe to enter Edit Mode.
- For each scene, choose
Static (fixed crop) or Pan (camera move).
- For Static, set position and zoom once.
- For Pan, scrub to each key moment, reframe, and click Add keyframe.
- Step through with
‹ / › to check the move, then play the clip before exporting.