Generate and style subtitles for every clip that reaches this node.
Schema
- Input: Video or clips from an upstream trigger or editing node. Video inputs are converted to a full-source clip automatically.
- Output: Clips annotated with the selected subtitle configuration
Open an existing node
Open a workflow that already contains Add Subtitles, then click the node on the canvas to open its subtitle style panel. The node is no longer available as a new palette addition; use Style Video in new workflows.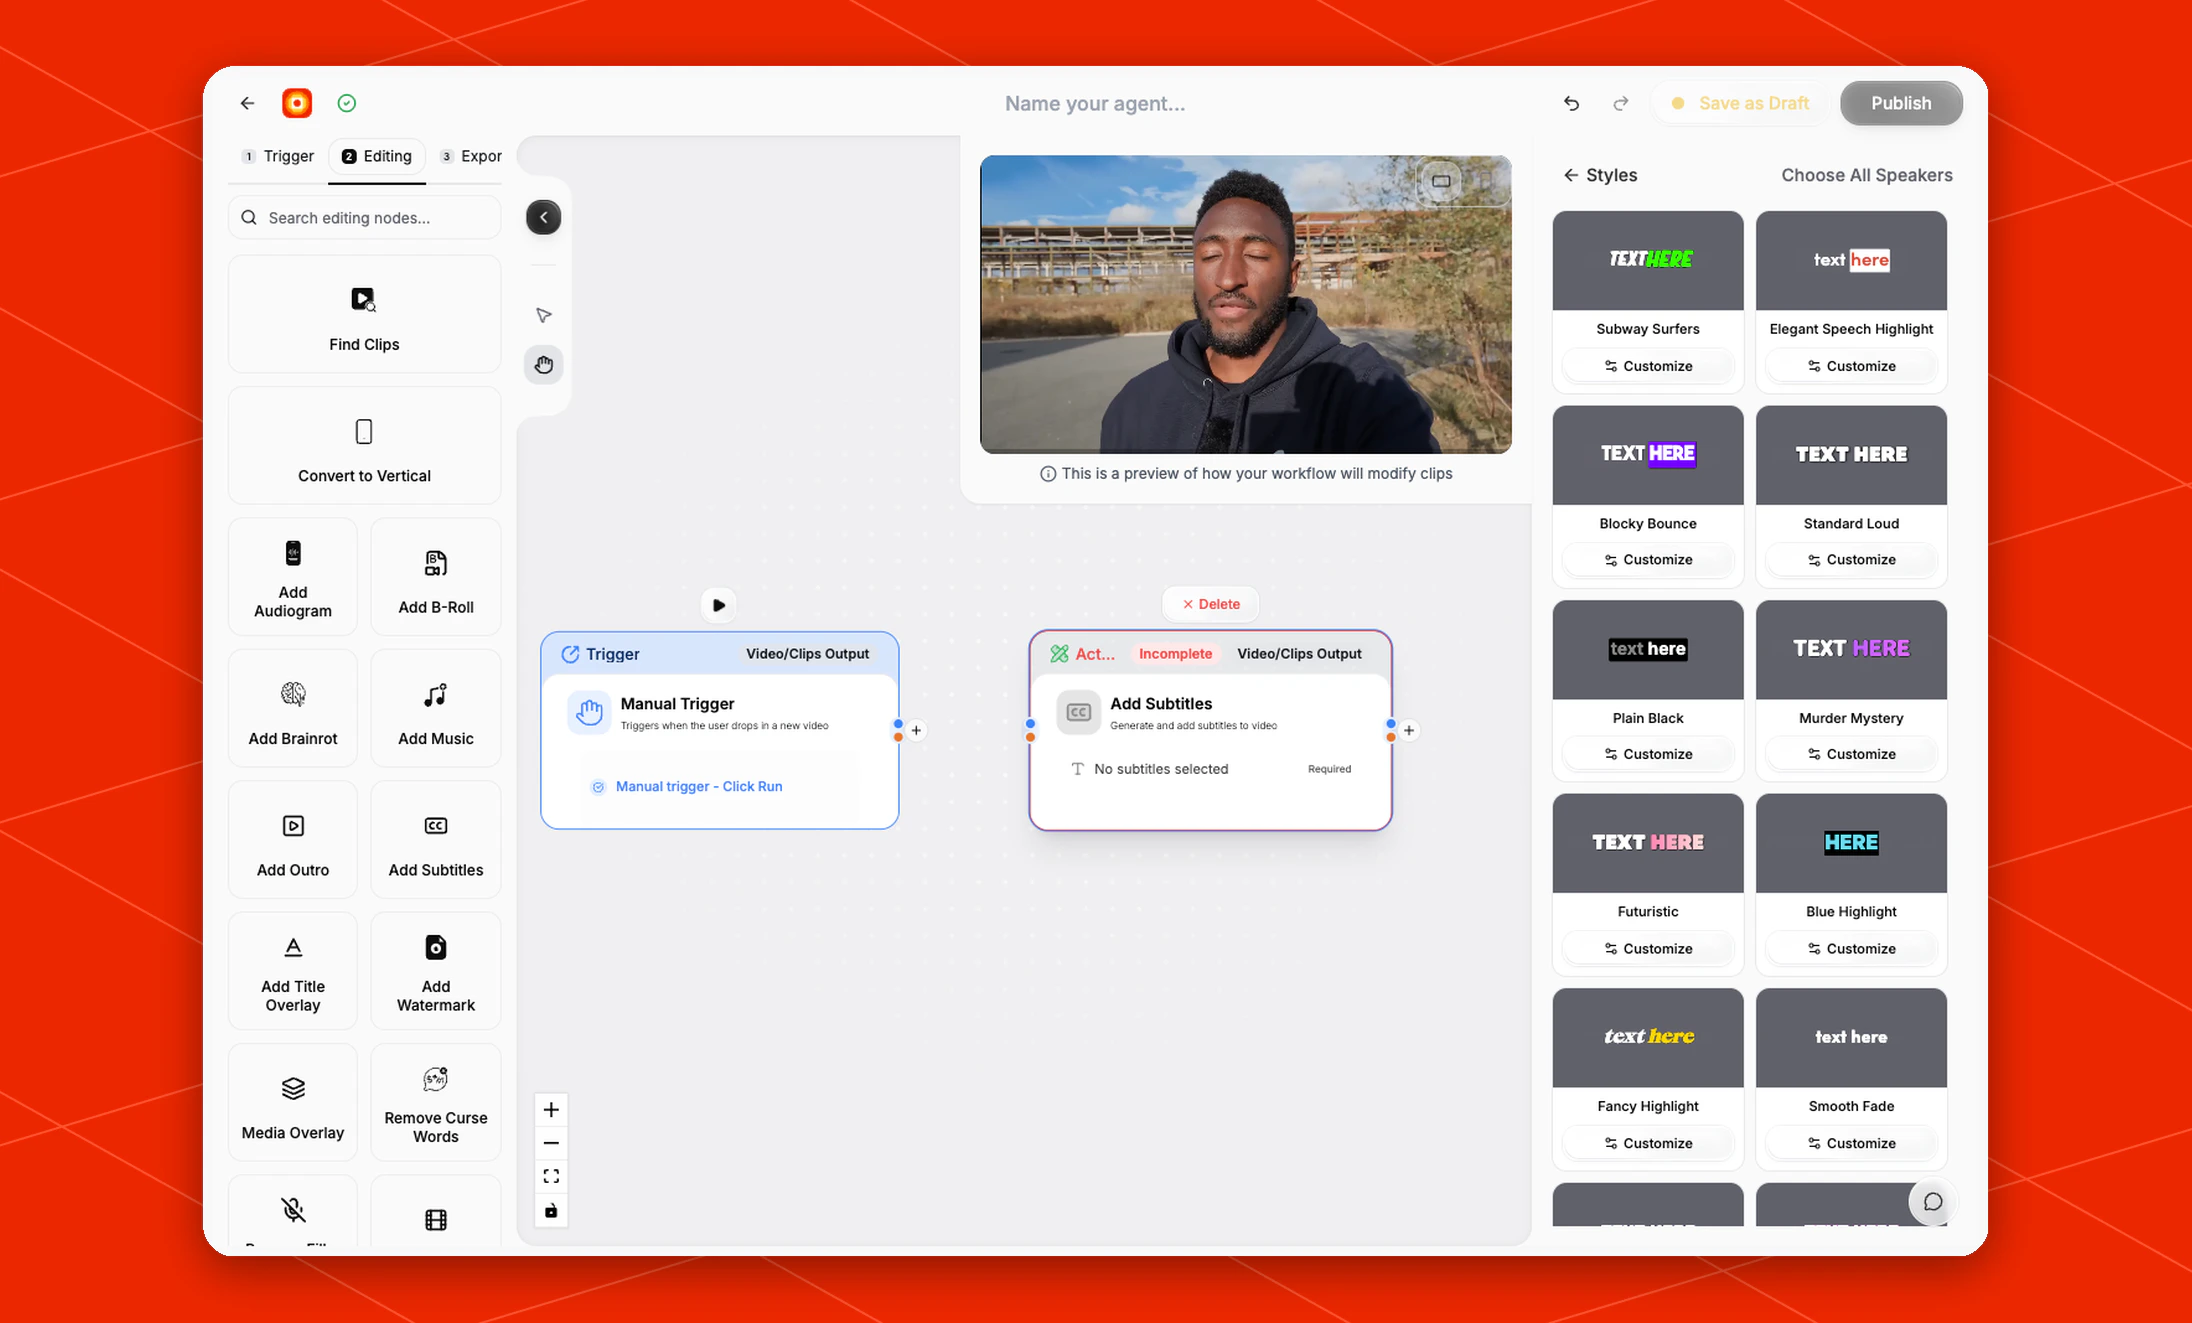
Choose a subtitle style
The right-side panel opens to Styles with a clip preview and preset subtitle looks. Current presets include options such as Subway Surfers, Elegant Speech Highlight, Blocky Bounce, Standard Loud, Plain Black, Murder Mystery, Futuristic, Blue Highlight, Fancy Highlight, and Smooth Fade. Until a style is selected, the node shows No subtitles selected and marks the setting as required. Select a preset to apply it, or click Customize on a preset when you want to adjust the style before using it. Use Choose All Speakers when the same subtitle style should apply across detected speakers. The built-in choices also include Field Notes, Editorial, Signal, Kinetic, Studio, and After Hours, plus Cinematic Dialogue, Cinematic Essay, and Cinematic Impact. Cinematic captions vary highlighted keywords’ size, weight, accent, and entrance. Other words follow the caption’s Animation setting: None shows the complete caption without word-by-word reveals. Cinematic style cards show their preview and name without descriptions.Highlight keywords
Turn on Highlight keywords above the Styles / Customize area. Set Keyword color to choose the accent. This option works with ordinary subtitle presets as well as cinematic styles; cinematic styles also change the selected words’ size and weight. The workflow selects a sparse set of words and complete short phrases from the retained transcript, considering contrasts, negation, names, and qualified numbers. It stores those selections as transcript keywords, so opening the clip in Studio shows the same marks in Transcript. Manual highlights and exclusions take priority. Turning the option off keeps manual highlights and removes automatic emphasis. This workflow option uses contextual text rules without a model call. In Studio, AI Tools → Keyword Highlights → Refine with AI offers a separate, explicit meaning-based pass. Review its choices in context. Neither option measures vocal stress. If transcript evidence is unavailable or too large to annotate during the workflow step, the setting remains on the clip for transcript initialization in Studio.Customize the style
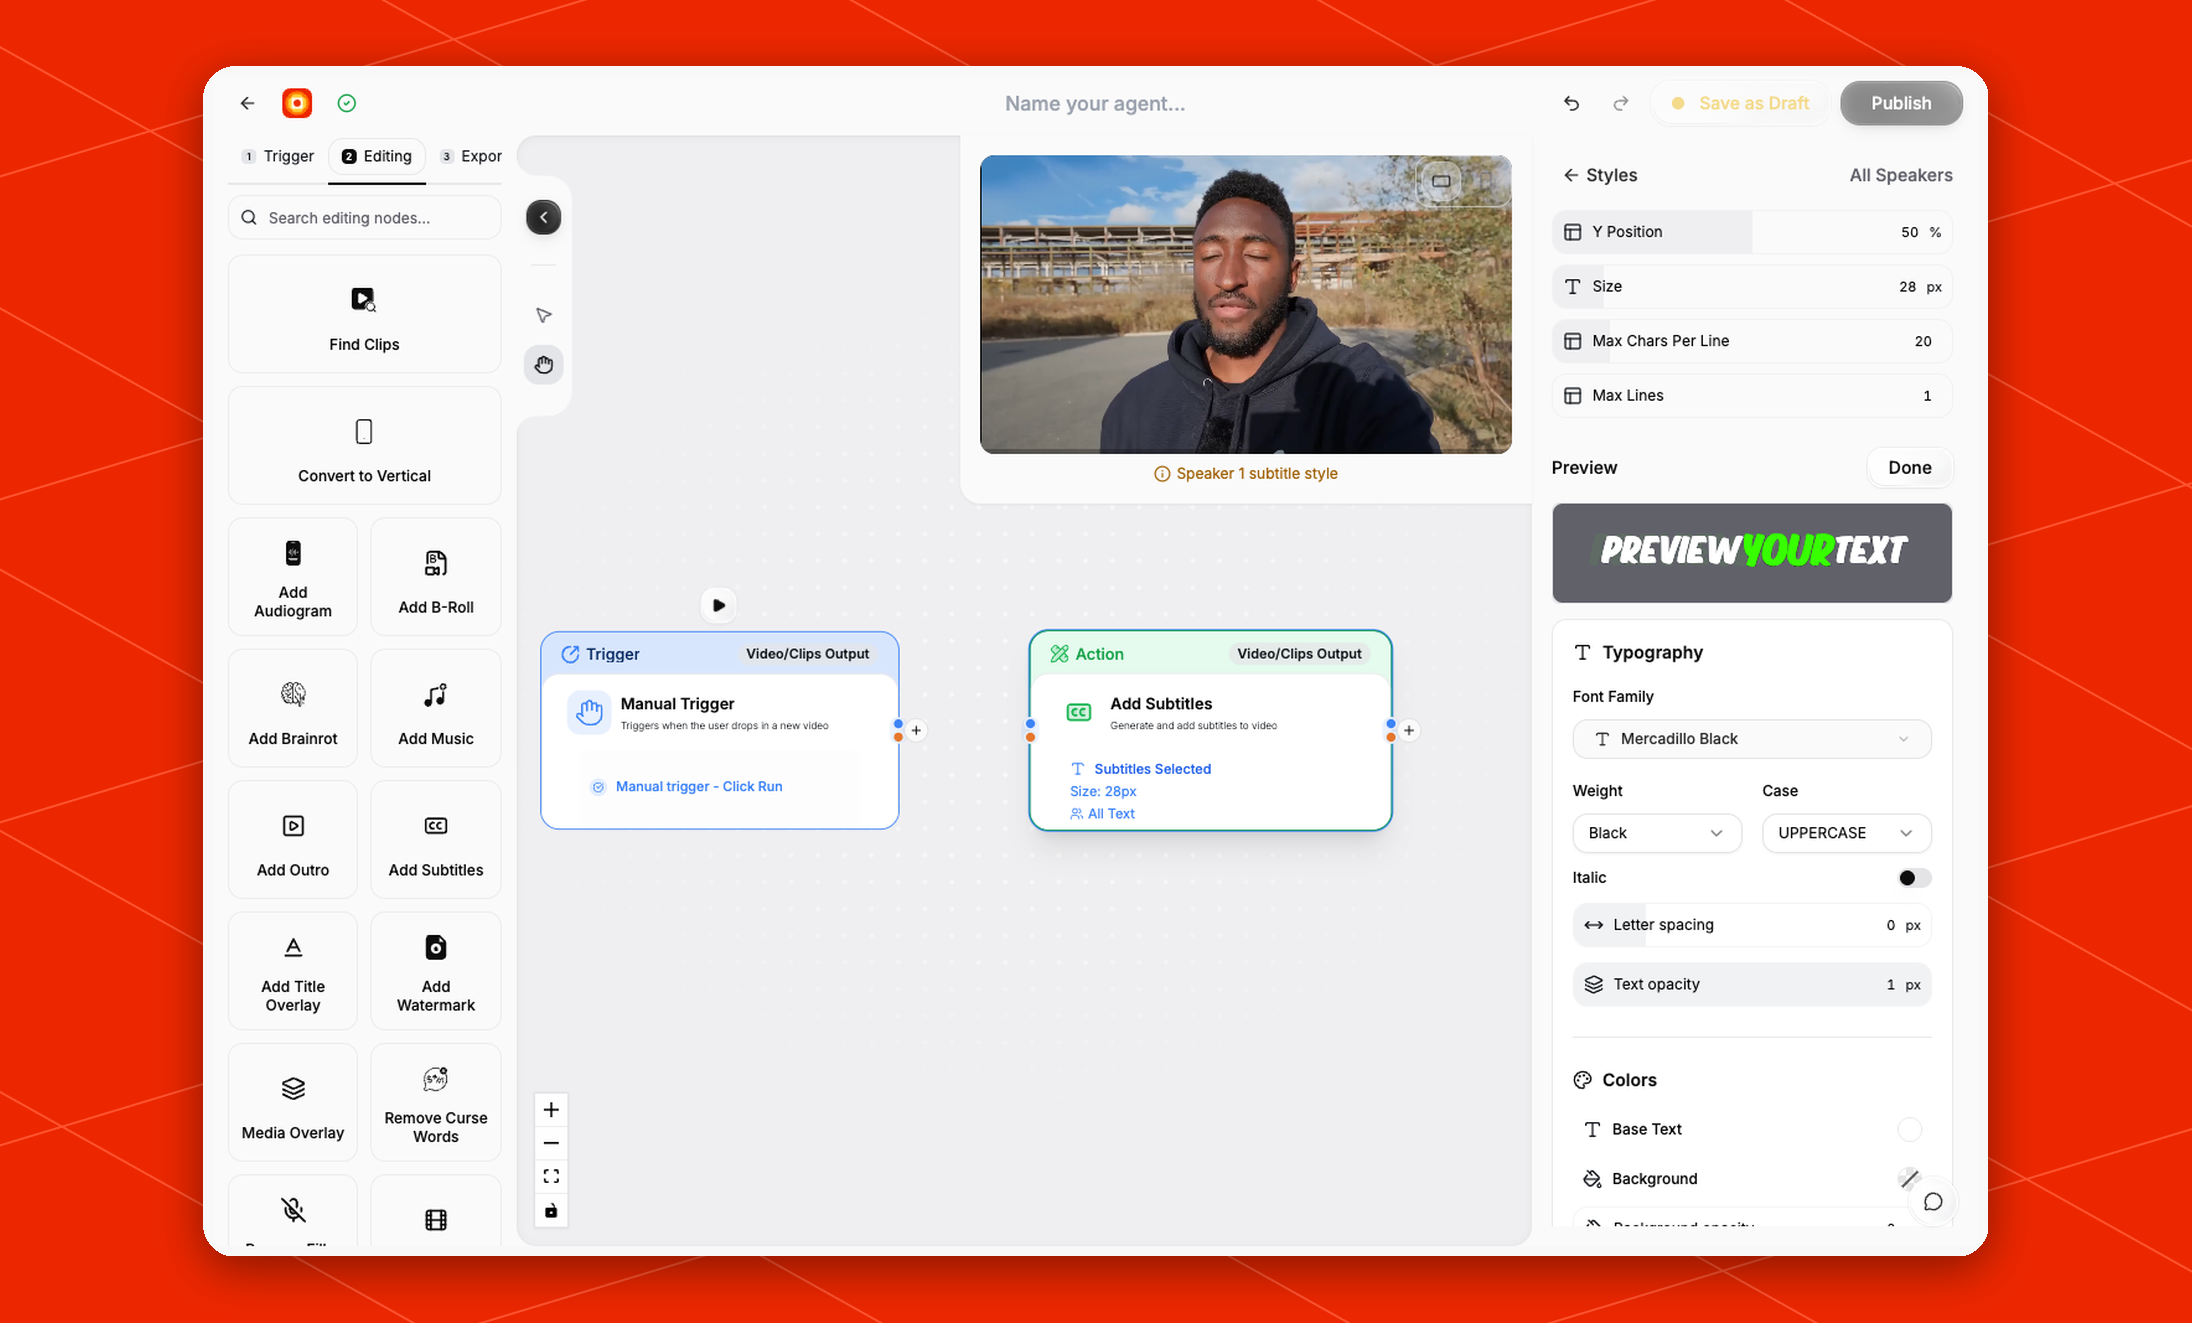
In Customize, enable Cinematic words to style just the highlighted keywords. The Cinematic keyword treatment dropdown offers Dialogue, Editorial, Impact, Whisper, Headline, Spotlight, Lift, Contrast, and Minimal, shown as small styled keyword samples. Changing a treatment keeps your subtitle font, background, placement, and caption animation. Minimal adds color without changing word size or weight. Adjust Expression, accent color, and keyword entrance to tune the effect. Use the main style picker to replace the complete subtitle design. Sliders update their displayed values immediately and batch preview updates; the final value applies when you release the control or finish typing. Click Customize on a preset to open the subtitle editor. The current controls include:- Y Position
- Text Alignment with Left, Center, and Right options
- Size
- Max Chars Per Line
- Max Lines
- Typography controls such as font family, weight, case, italic, letter spacing, word spacing (extra room between words, useful when pop-style word animations crowd neighbors), and text opacity. Pop-style word animations automatically leave room for the enlarged word, so a line near the frame edge is sized slightly smaller rather than letting the popped word clip
- Colors controls such as base text and background
- Background treatment options for no background, a single block, per-line blocks, or an Offset highlight marker stripe behind the lower portion of each line
- Highlight coverage from 5–100% to control how much of the text height the offset marker covers